Record Selection
As you learned in Understanding Snippet Types, a Single Item Snippet is designed to focus on and display the detailed information of just one specific record from your Airtable table. This page explains how you choose that particular record within the Snippet Builder.

Choosing Your Record in the Builder

When you select the “Single Item” snippet type in Step 1 of the builder, Step 2 is where you specify which record’s details this specific snippet instance will display.

In the data preview table on the left side of Step 2, you will see all the records currently in your selected Airtable table. Each record has a radio button next to its name (or primary field).

Simply click the radio button next to the record whose details you want this snippet to present.

Once you select a record, the phone preview on the right (in Step 3) will immediately update to display the detailed information of that chosen record. This gives you a live preview of what your end-user will see.


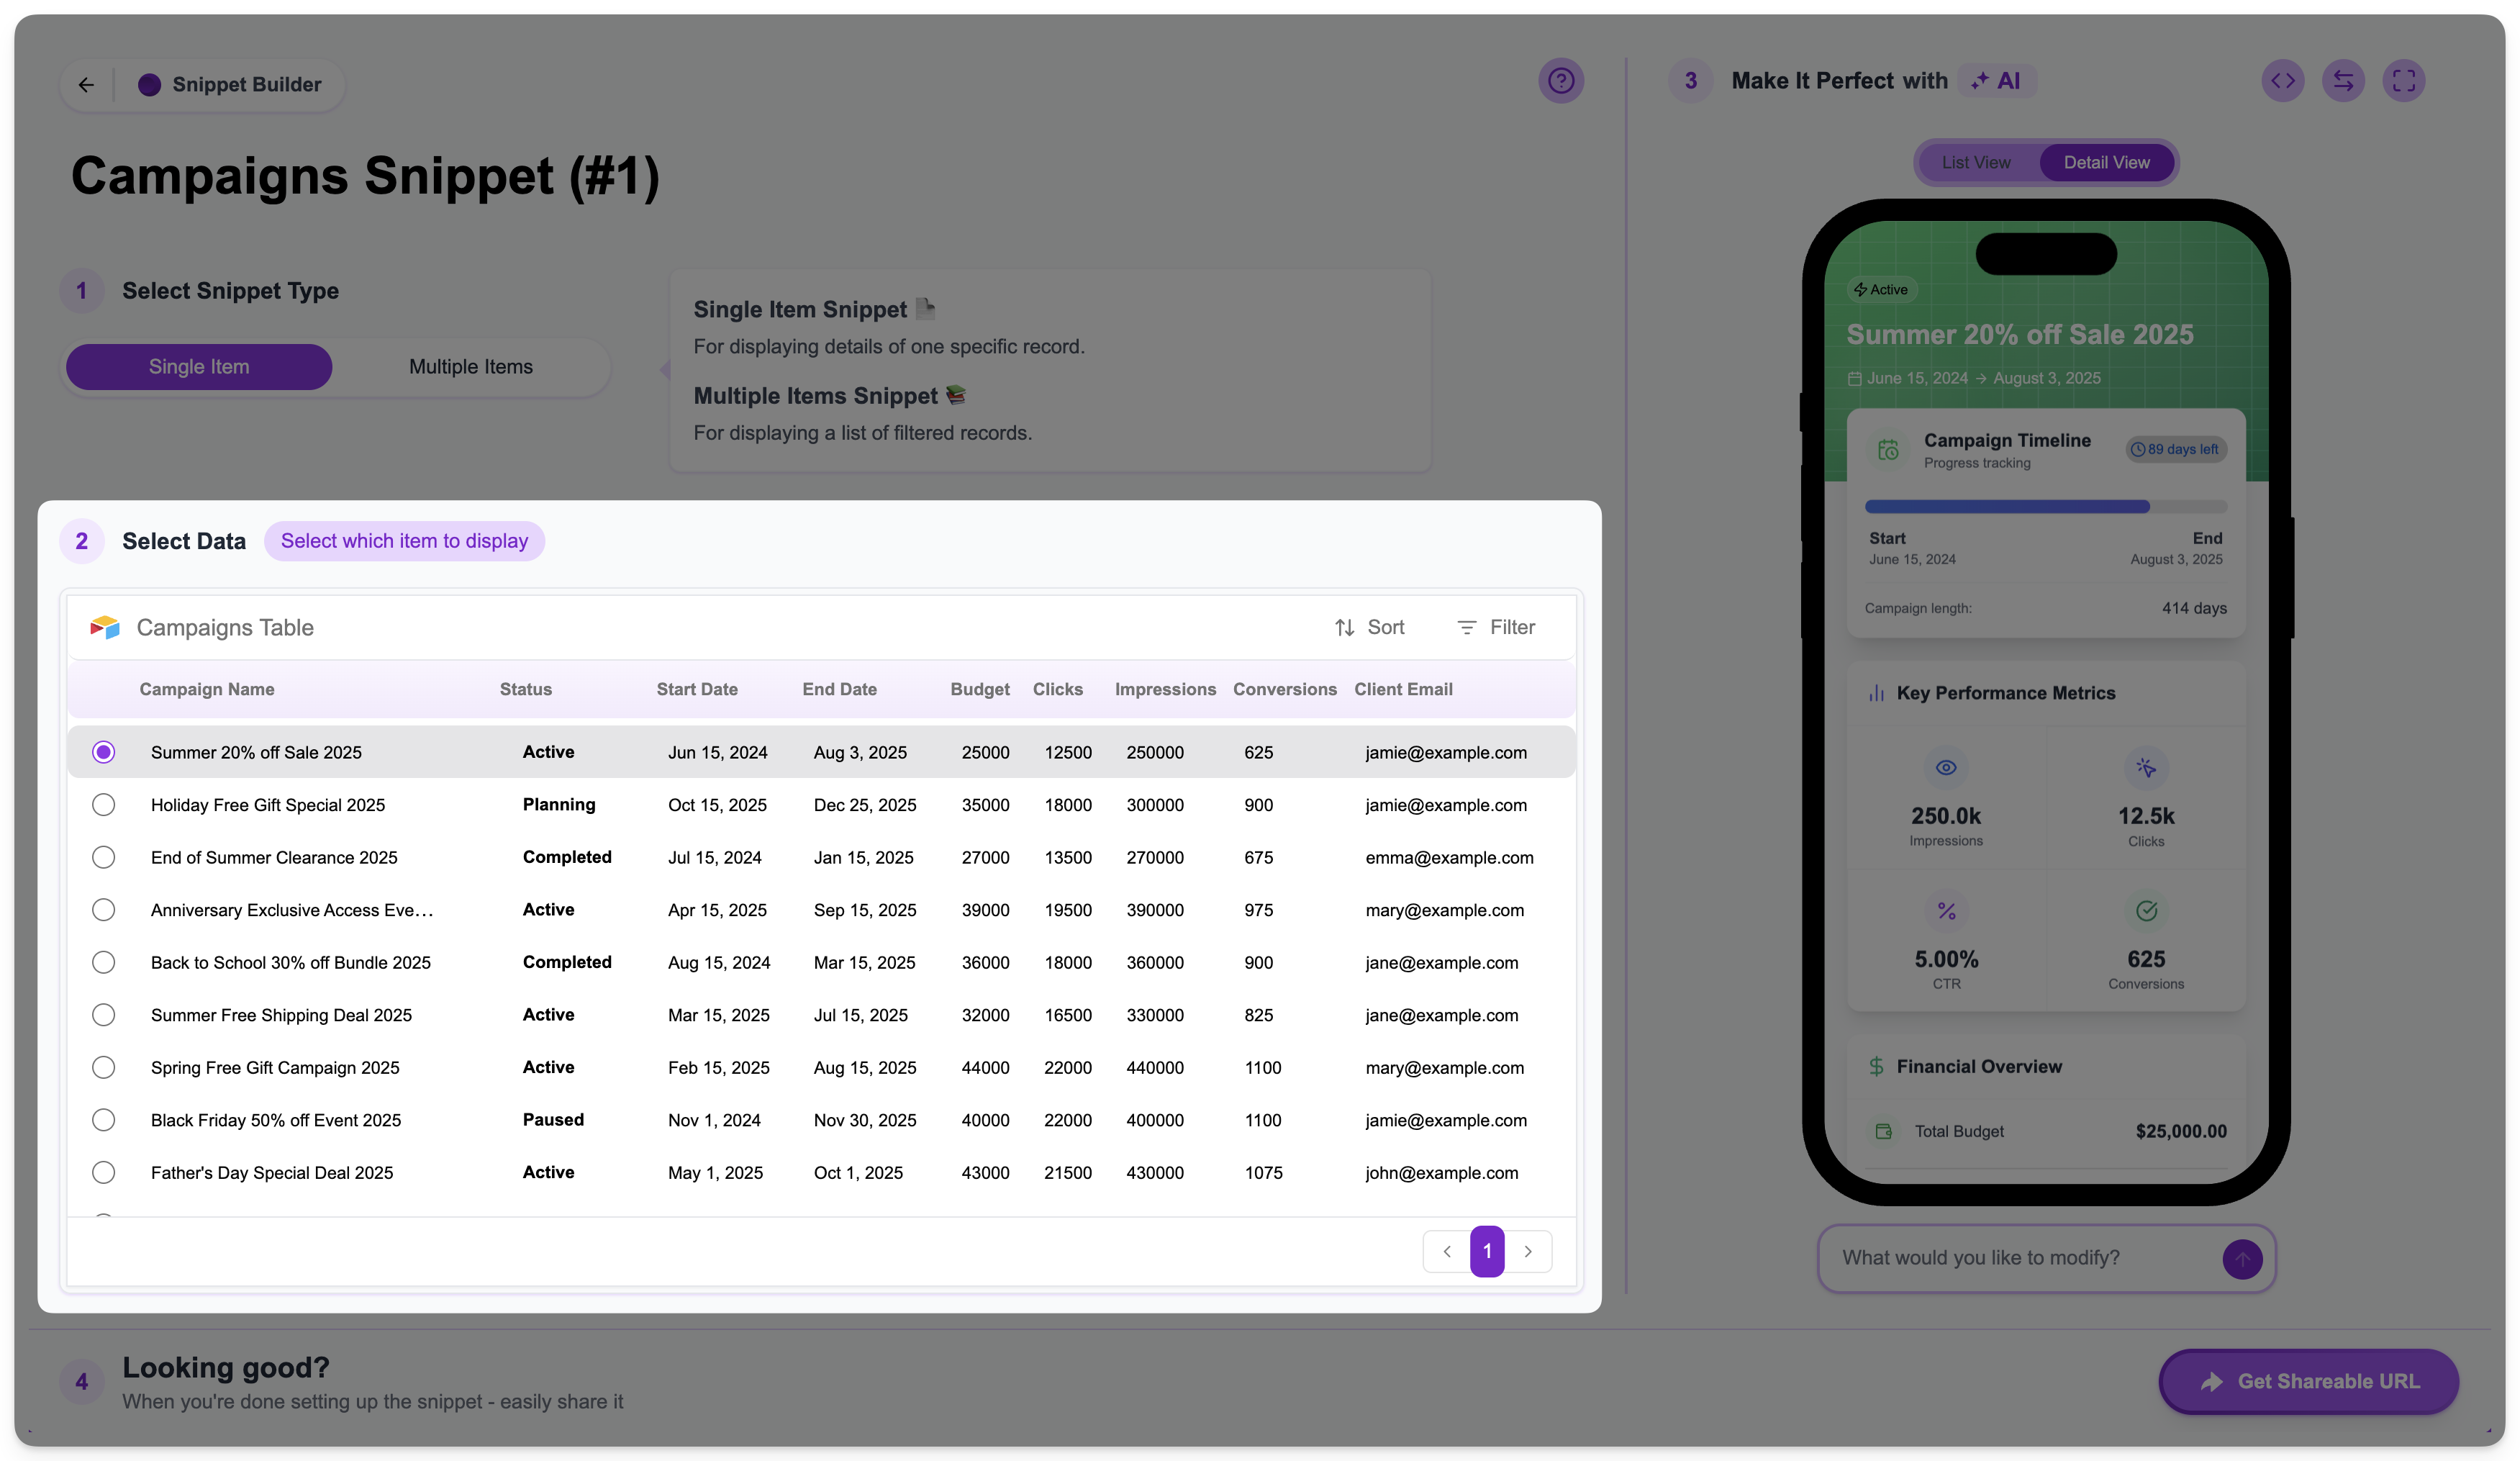
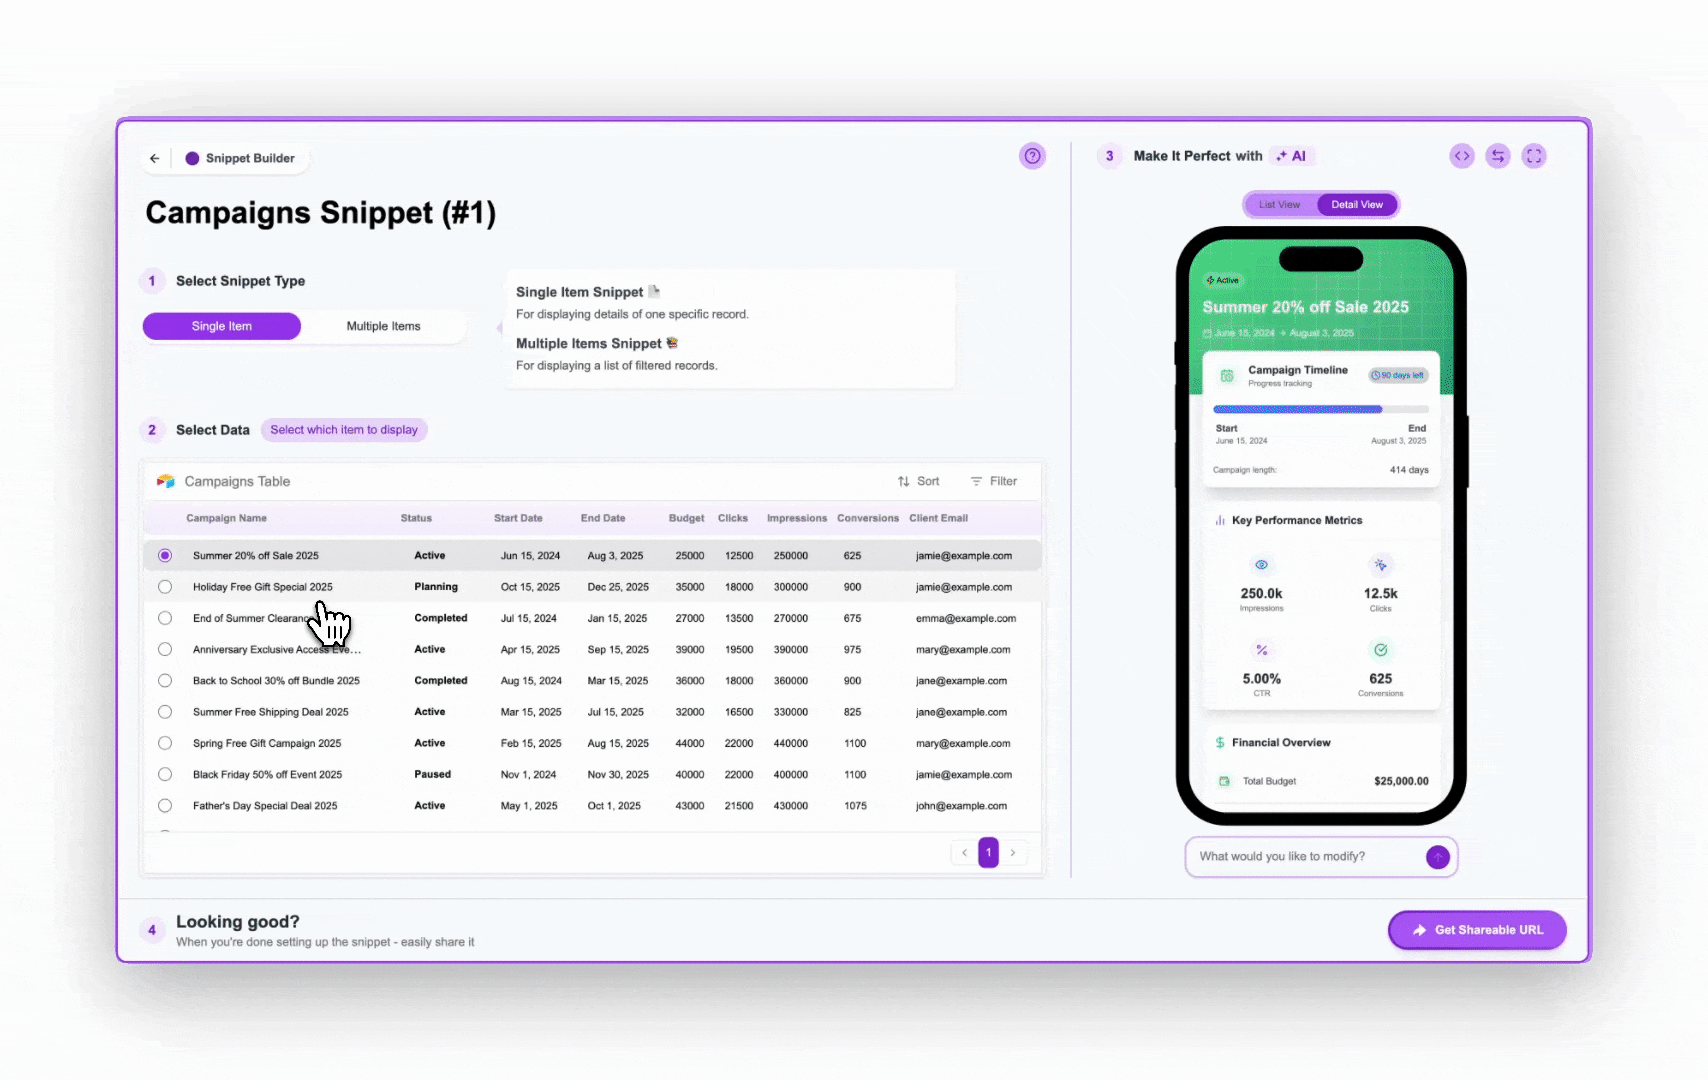
Impact on the Shareable URL

The specific record you select in Step 2 directly influences the Shareable URL for this Single Item Snippet. The unique Record ID of the selected record is automatically embedded as a parameter in the snippet’s URL.

For example, if you select the record whose Record ID is rec123456789, the Shareable URL for this snippet might look something like:

https://app.trycrust.ai/<your_snippet_id>/detail?rec=rec123456789

Anyone using this specific URL will be directed to your snippet displaying only this specific record details. To share a different record’s details via a Single Item Snippet, you can select that other record in Step 2 and generate a new, stand-alone Shareable URL.

For a more detailed breakdown of how the Shareable URL is constructed and its parameters, see: Understanding the Shareable URL Structure