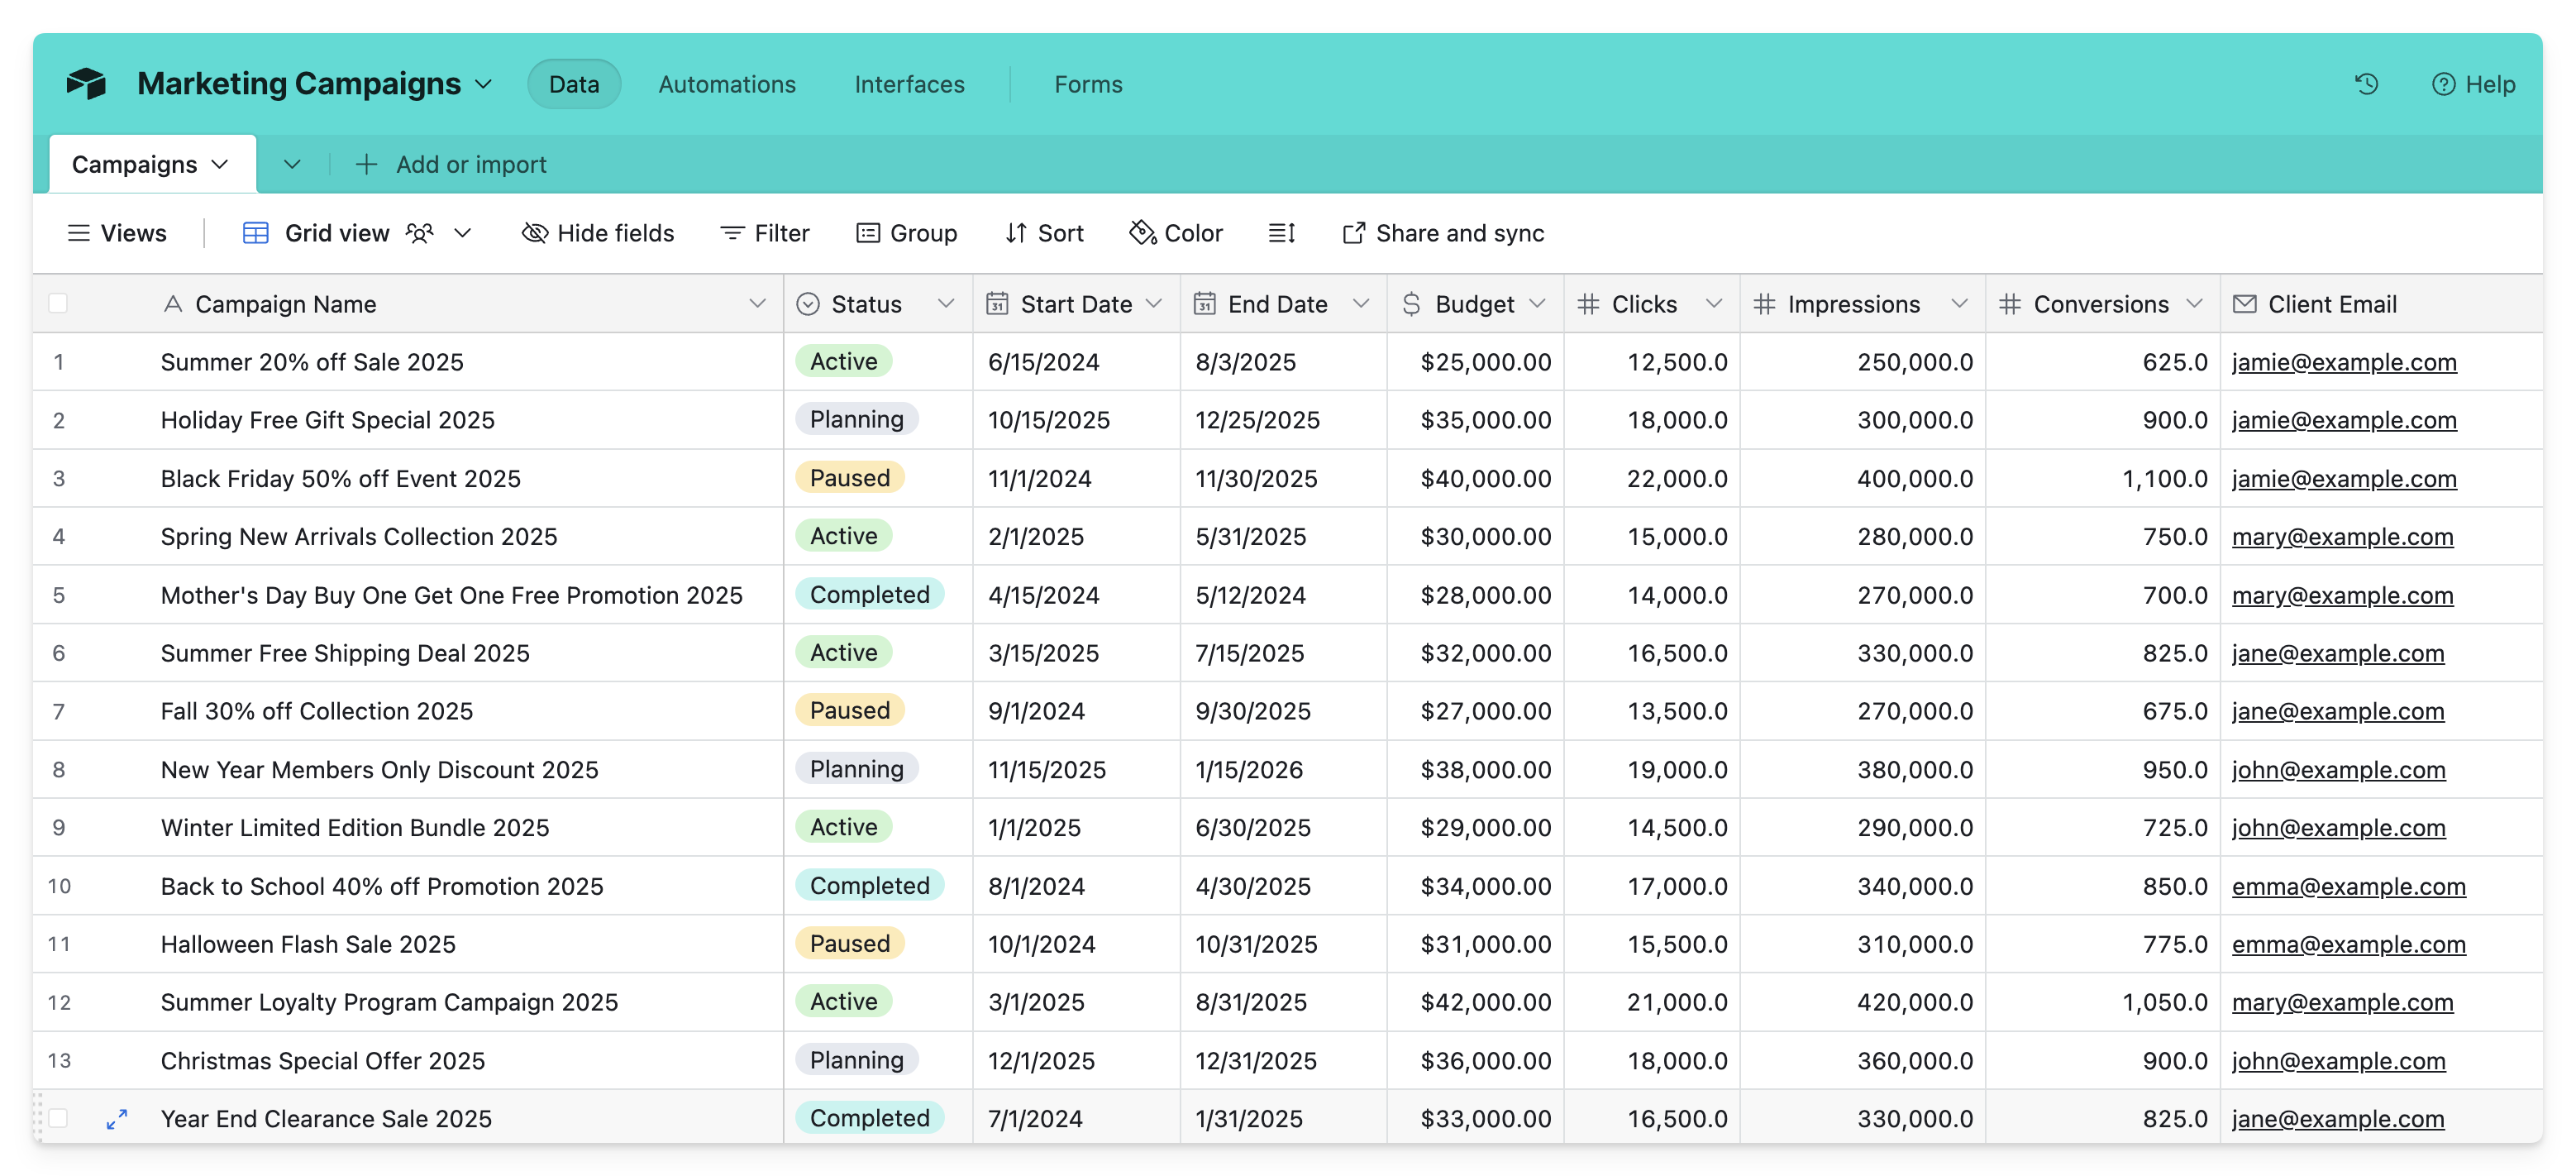
Our Example Airtable Base: Marketing Campaigns
Imagine you have an Airtable base to manage your marketing campaigns. Let’s say you have a “Campaigns” table with fields like:The name of the marketing campaign.
Current status of the campaign (e.g., Planning, Active, Paused, Completed).
The date the campaign begins.
The date the campaign ends.
The allocated budget for the campaign.
Number of clicks generated by the campaign.
Number of impressions generated by the campaign.
Number of conversions attributed to the campaign.
The email address of the client associated with the campaign. Used for permissions.
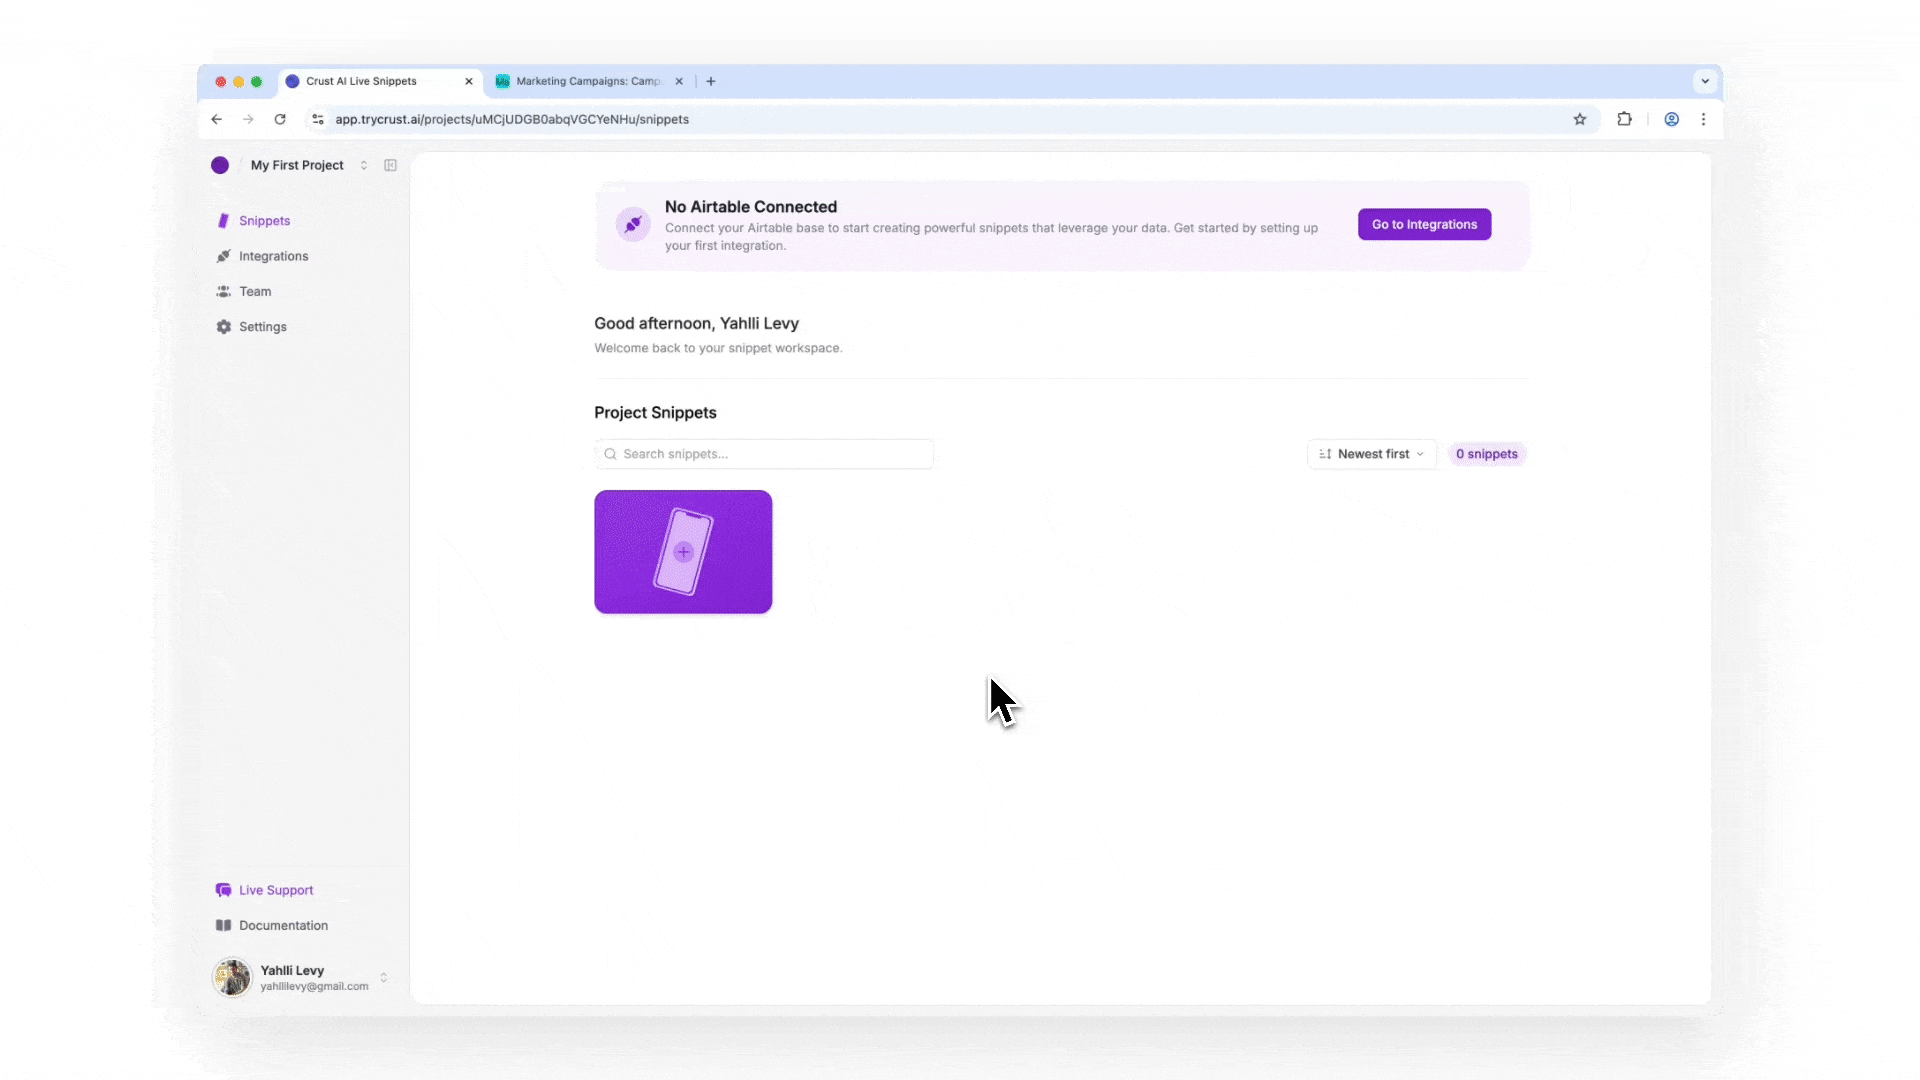
Step 1: Connect Your Airtable Base
- Go to app.trycrust.ai and sign in.
- You’ll be prompted to add an integration and connect your Airtable base.
- Follow the prompts in the Airtable authorization window that appears. Select the workspace and the specific base containing your “Campaigns” table.
- Grant Crust AI the requested permissions (read access to data and structure, and write access if you plan to add interactive elements later).
Step 2: Create a New Snippet
- Click the
Create New Snippetbutton. - Select the Airtable table you want to build the snippet from (e.g., “Campaigns”).
- Click
Create Snippet.
Step 3: Configure a Single Item Snippet (Detail View)
By default, Crust AI sets a “Single Item Snippet” type initially.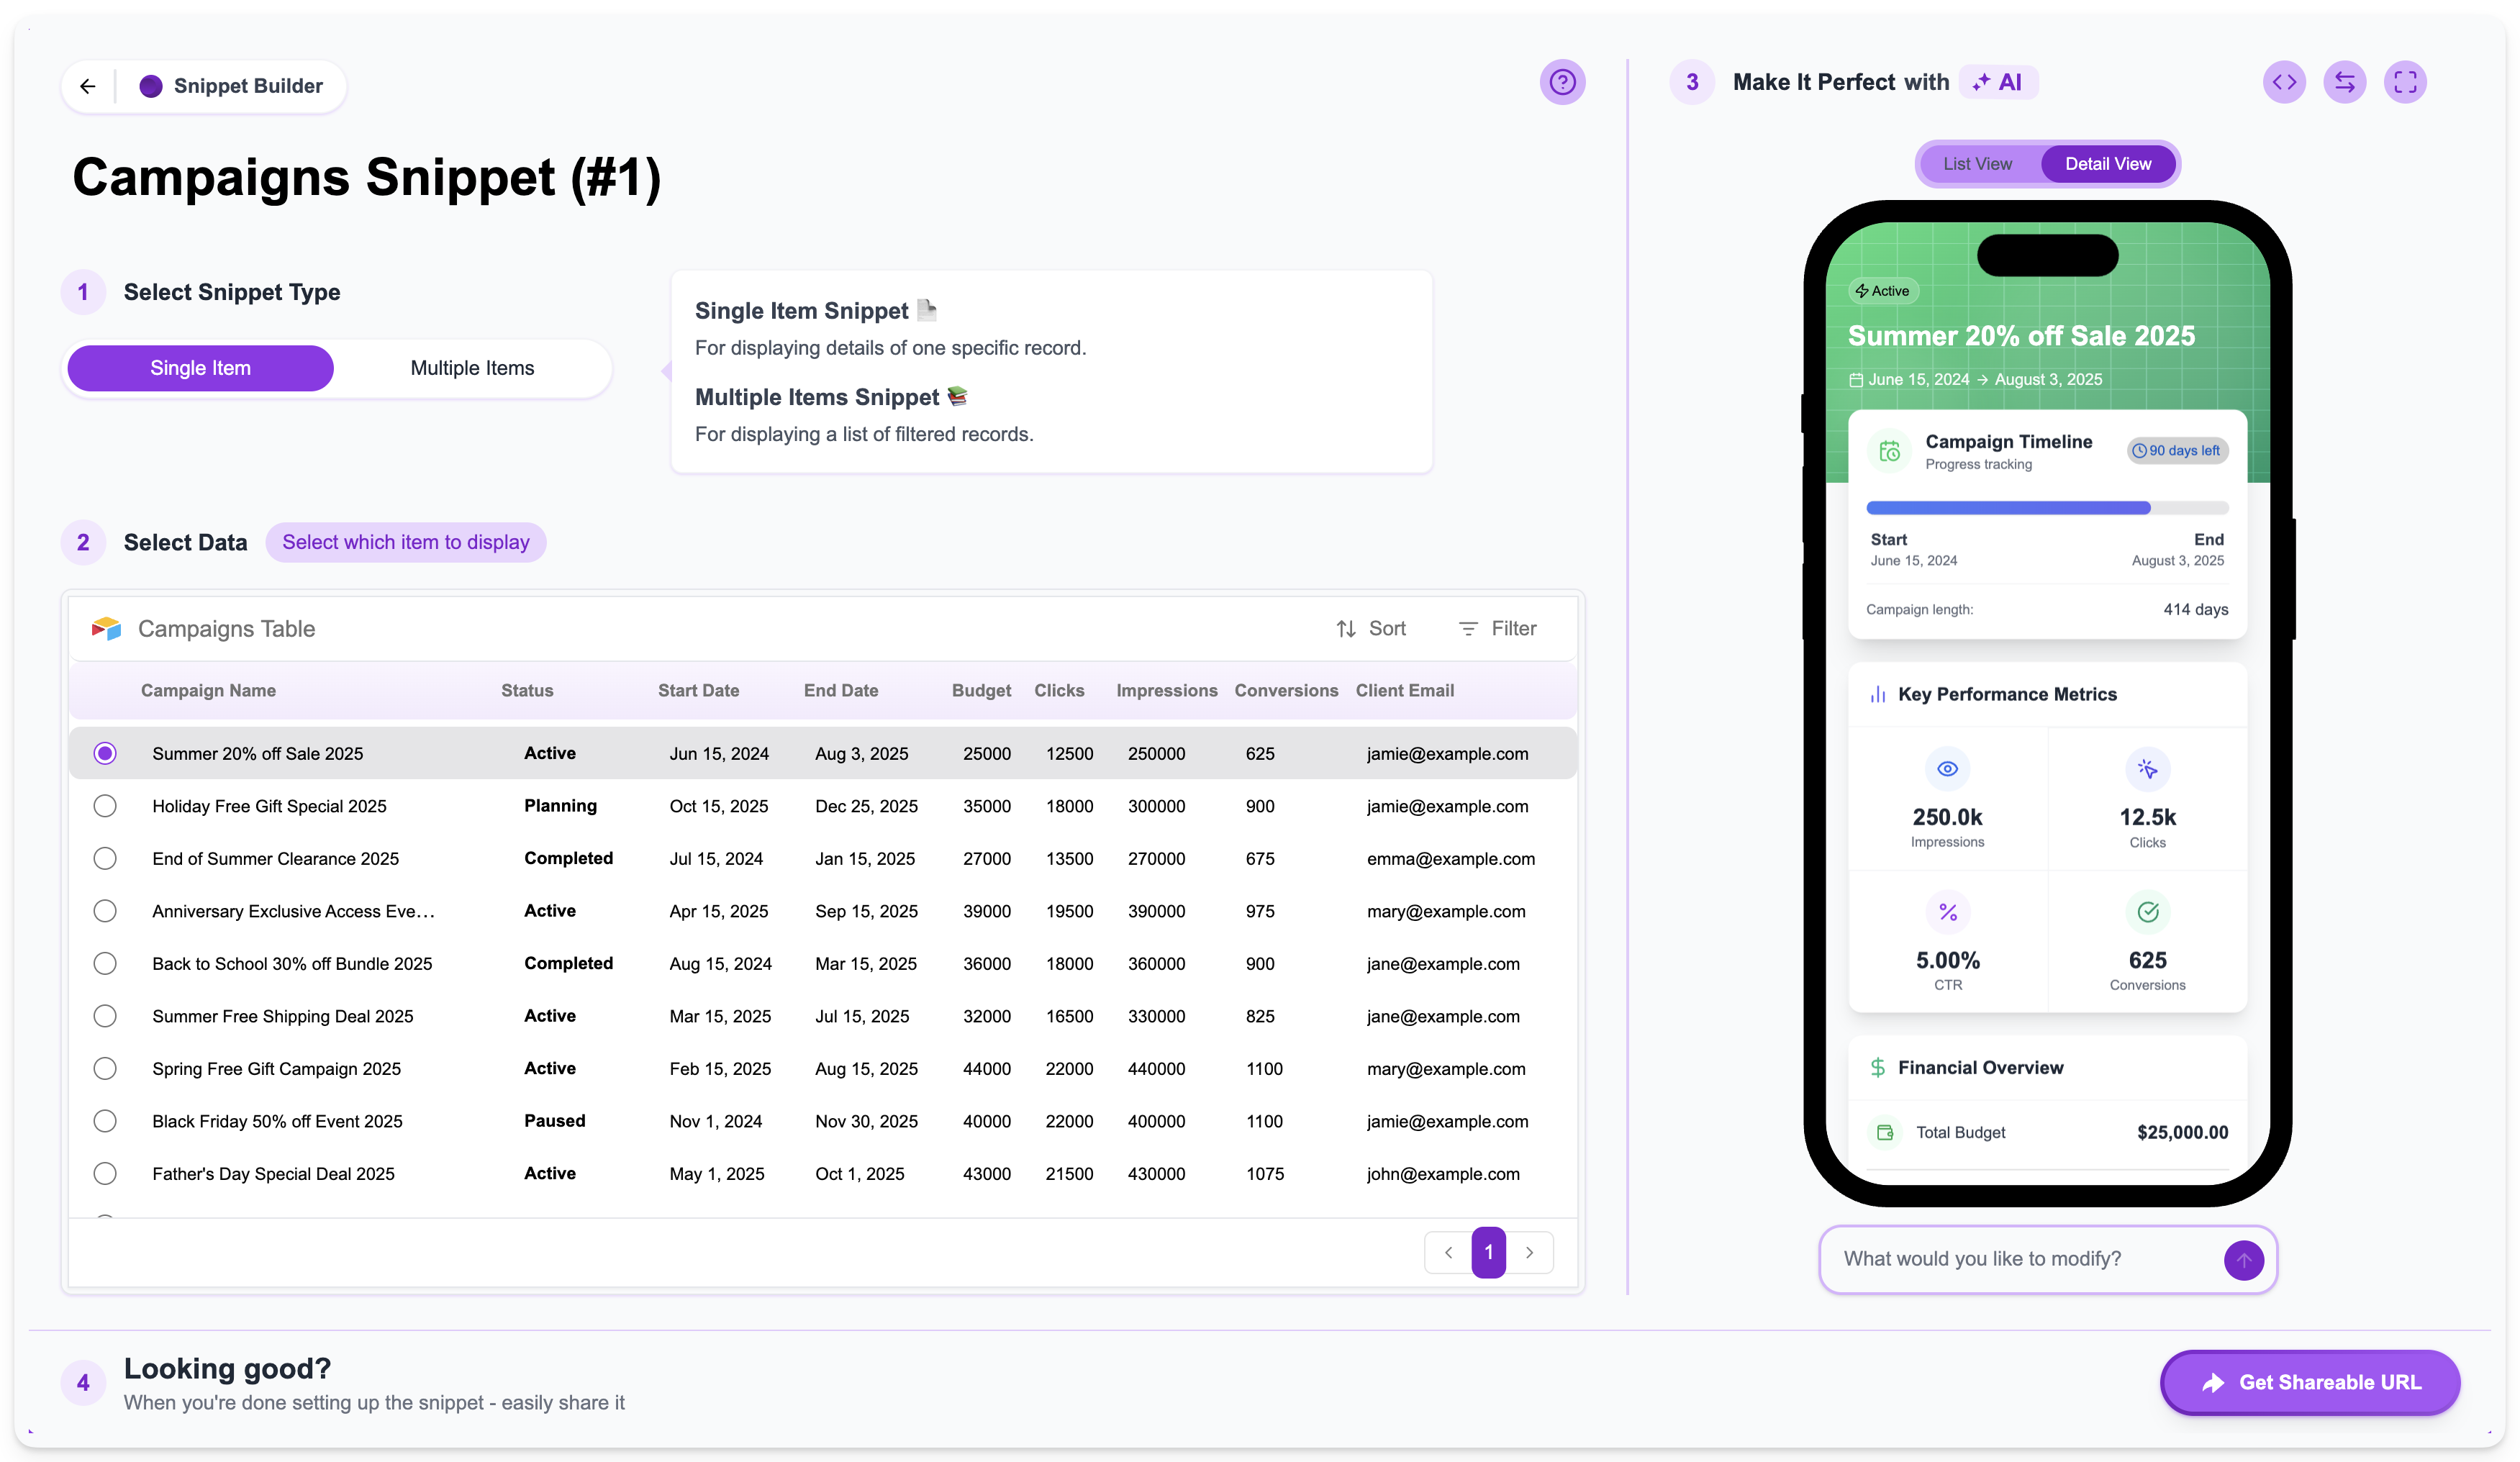
Understanding Single Item Snippets
A Single Item Snippet focuses on showing the details of just one record. On the left side of the screen, you see a preview of your table data. The phone preview on the right shows how the details of the currently selected record in the table preview would look in the snippet’s Detail View. You can click on different records in the table preview on the left to see how the phone preview on the right updates to show the details of that specific record.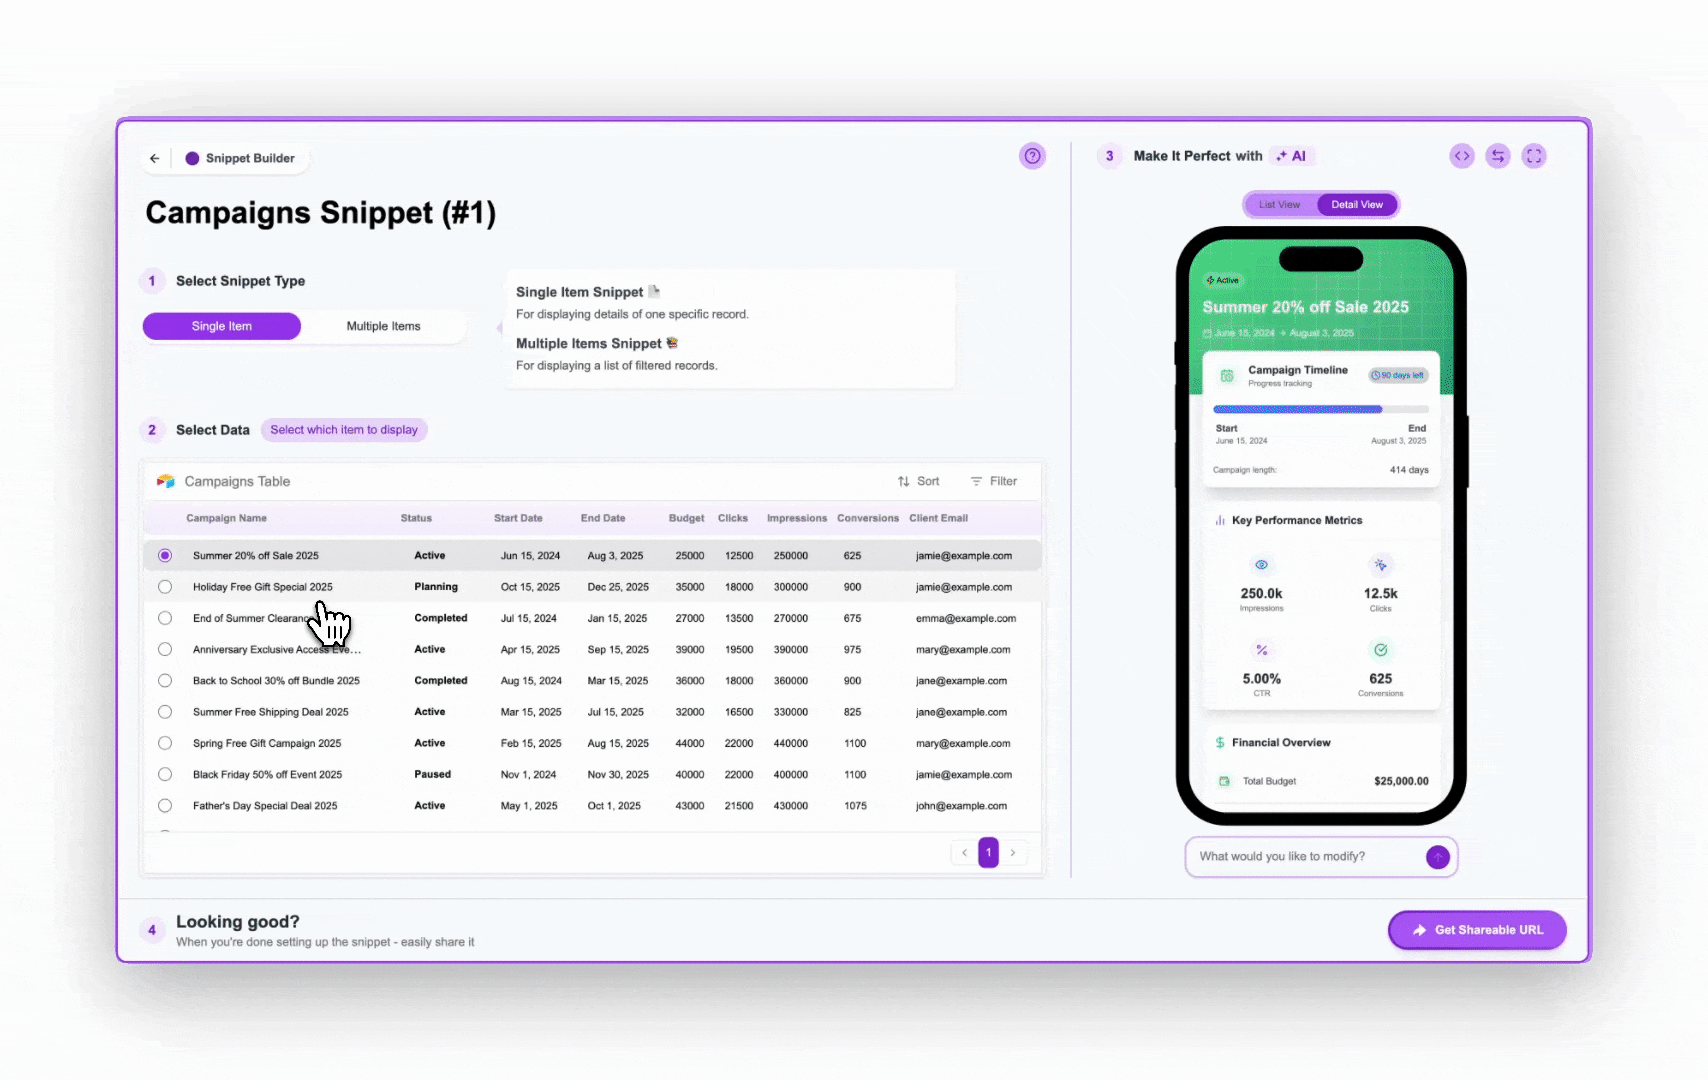
About Shareable URLs for Single Item Snippets
The Shareable URL for a Single Item Snippet is designed to point to a specific record. It typically includes the record’s unique ID as a parameter in the URL. If you get the shareable URL for a Single Item Snippet, you’ll notice a parameter like?rec=recXXXXXXXXXXXXXX at the end of the URL. Changing the record selected in the builder before getting the URL will result in a different record ID in the URL, linking to that specific record.
To learn more about how this works, see: Understanding the Shareable URL Structure
To learn how to set which specific record is shown in the single item snippet, see: Selecting a Record for Single Item Snippets
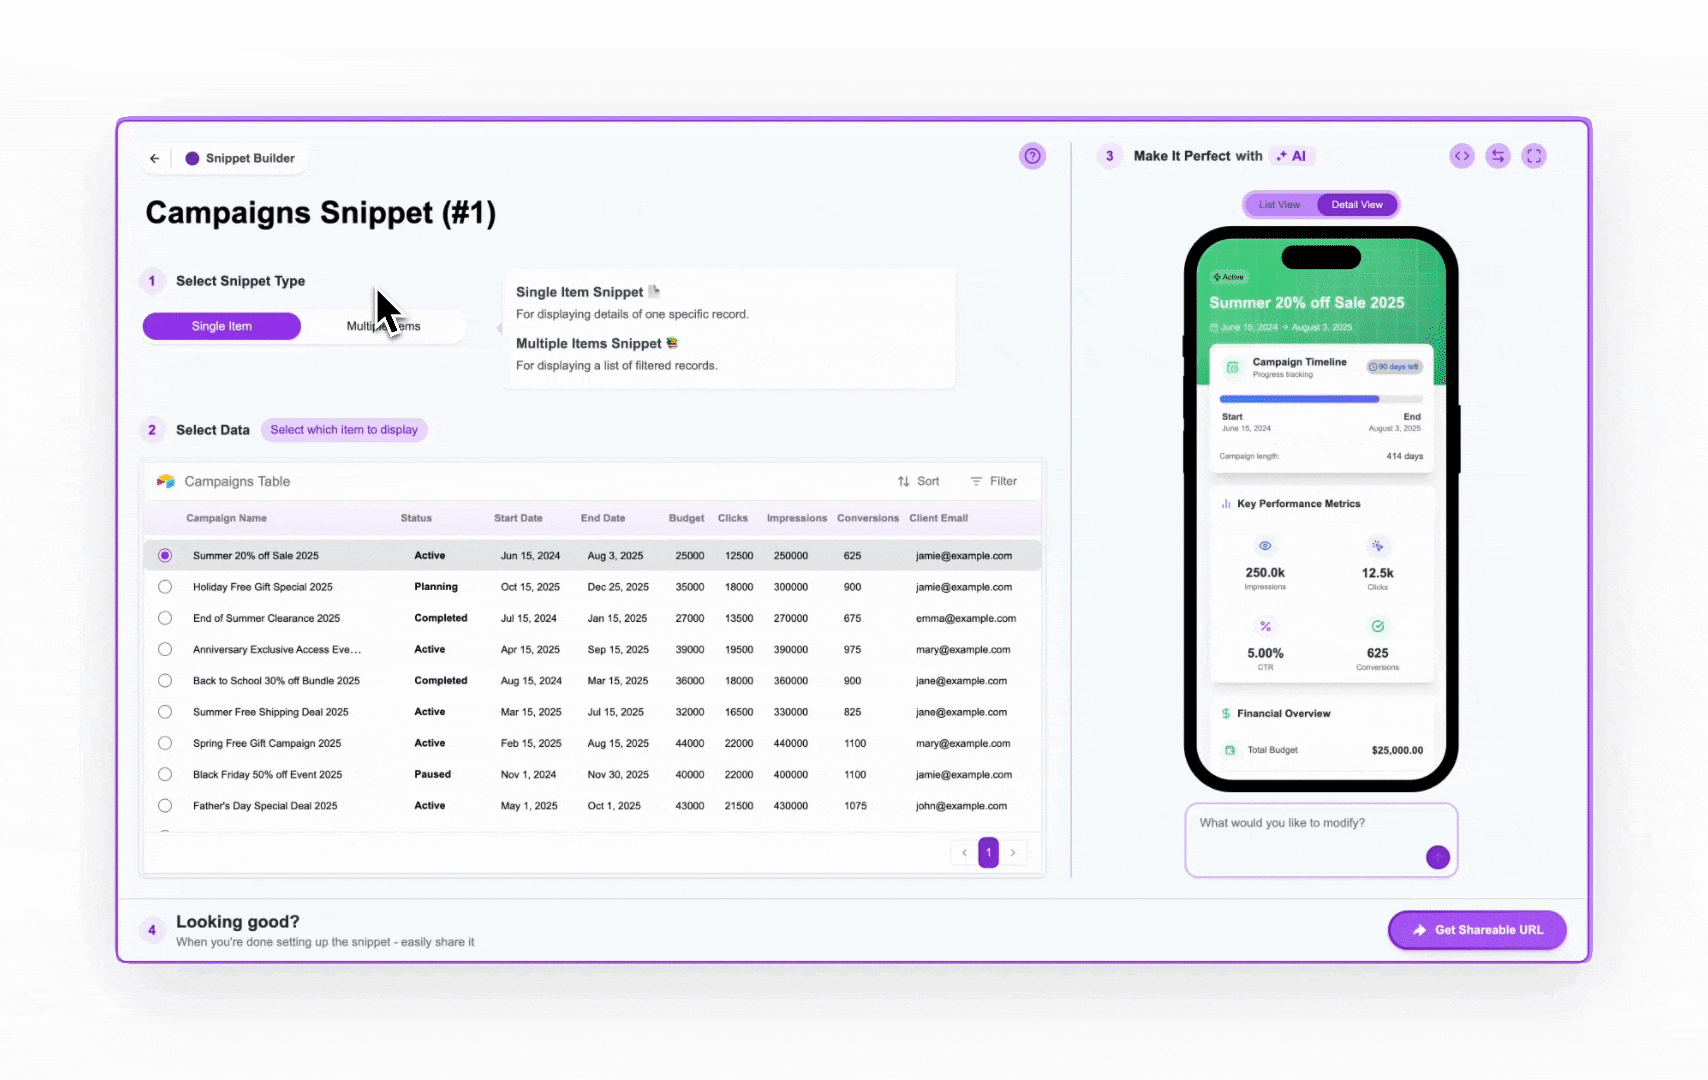
Step 4: Customize the Appearance (Optional)
While the AI generates a functional starting point, you can easily customize the look and feel. In the “Make It Perfect” section (Step 3), you can use natural language prompts to request design changes. For example you could type something like: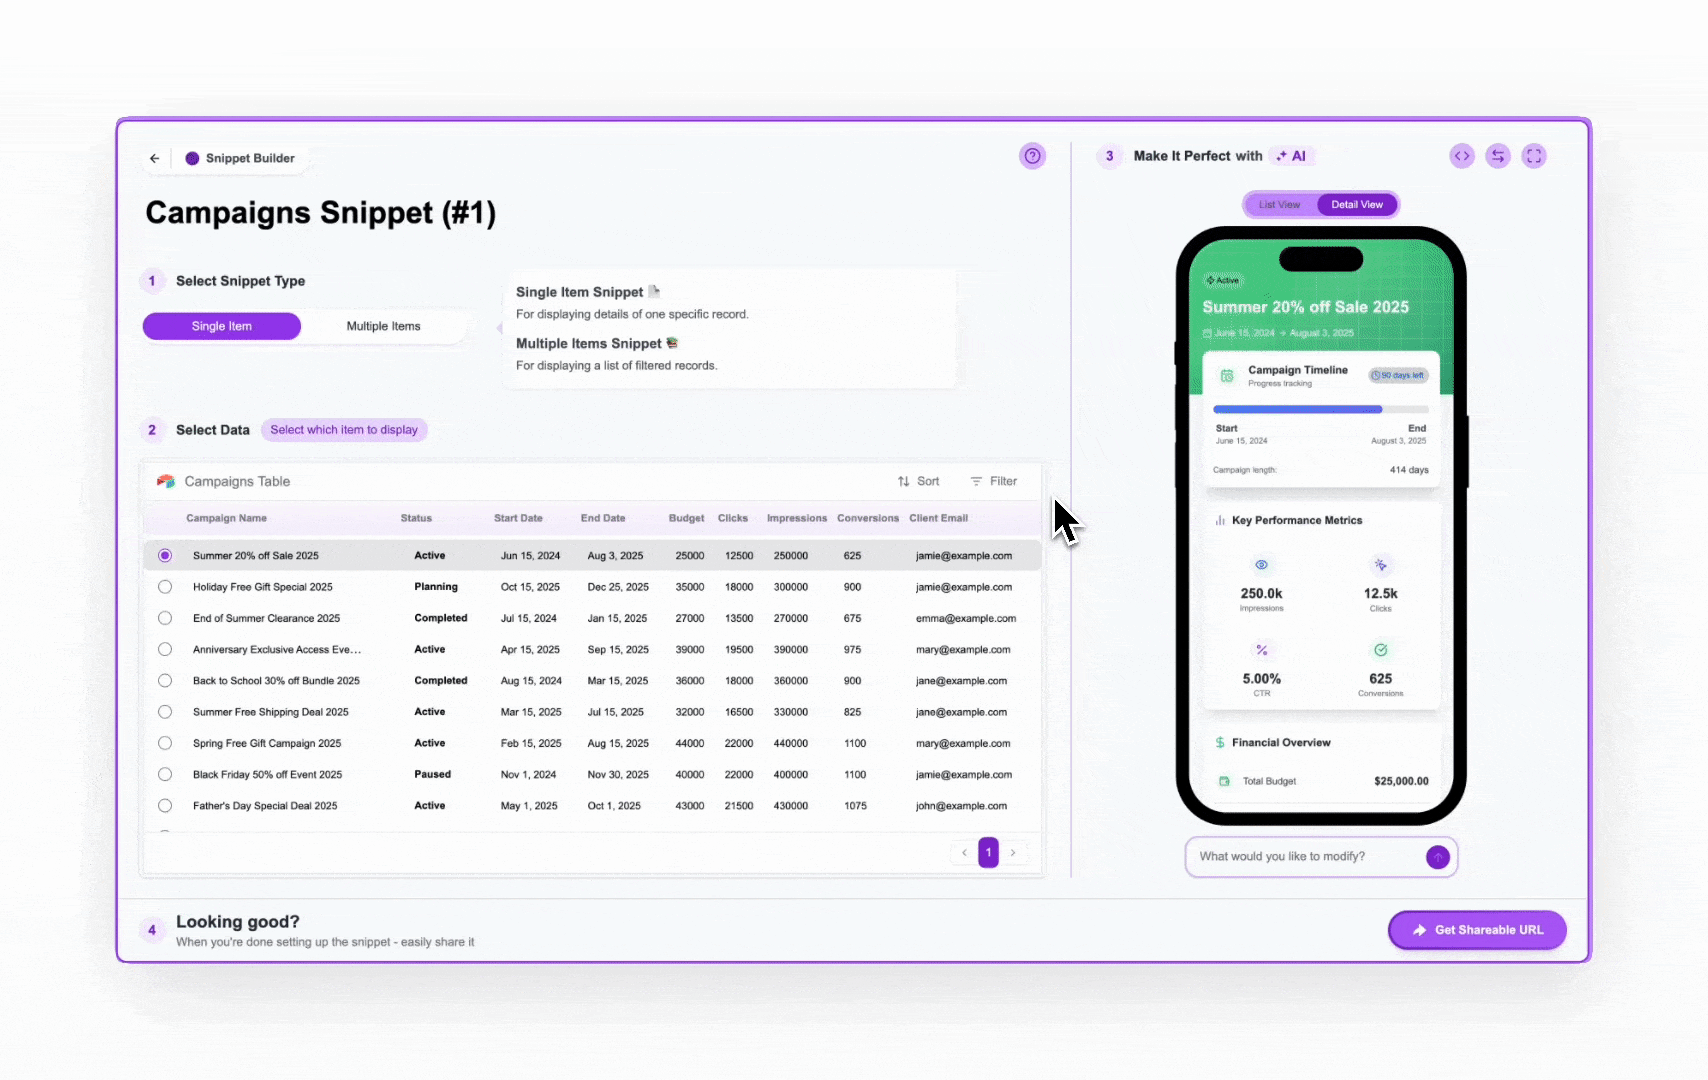
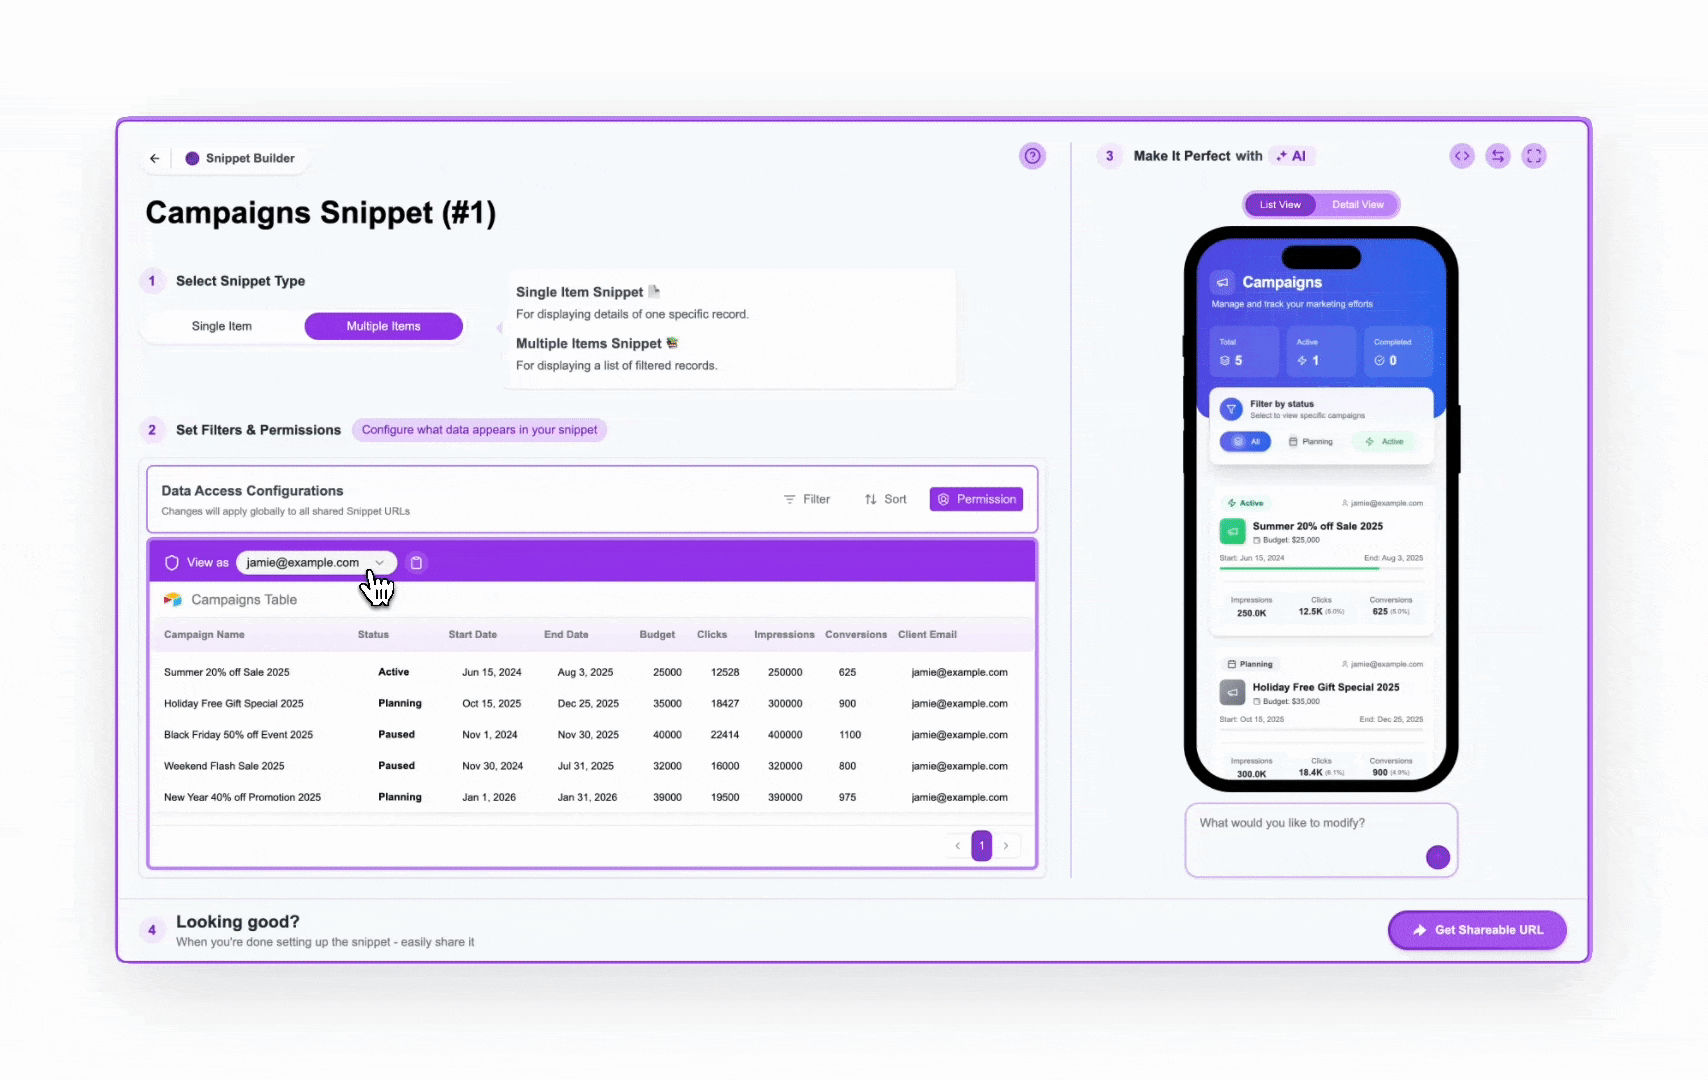
Step 5: Change to a Multiple Items Snippet (List View + Detail View)
Now, let’s say you want a client to see all their campaigns in a list, not just one at a time.- In the Snippet Builder, go back to Step 1: “Select Snippet Type.”
- Choose the
Multiple Itemstype.
Navigation Between Views
In a Multiple Items snippet, the Detail View is accessed by clicking on a specific item within the List View. Crust AI automatically sets up this navigation for you.
In a Multiple Items snippet, the Detail View is accessed by clicking on a specific item within the List View. Crust AI automatically sets up this navigation for you.
Step 6: Control Which Items Appear: Set Permissions
By default, the Multiple Items snippet shows all records from the table. To ensure a client only sees their own campaigns, we will set up User-based Permission.- Go to Step 2: “Set Filters & Permissions.”
- Click on the
Permissiontab within this section. - Select the
User-based permissionoption. - You’ll be asked “Which field holds the user’s identifier?”. Choose the field in your Campaigns table that contains the value you’ll use to identify the user. In our example, this is the
Client Emailfield. - Click
Apply Permission.
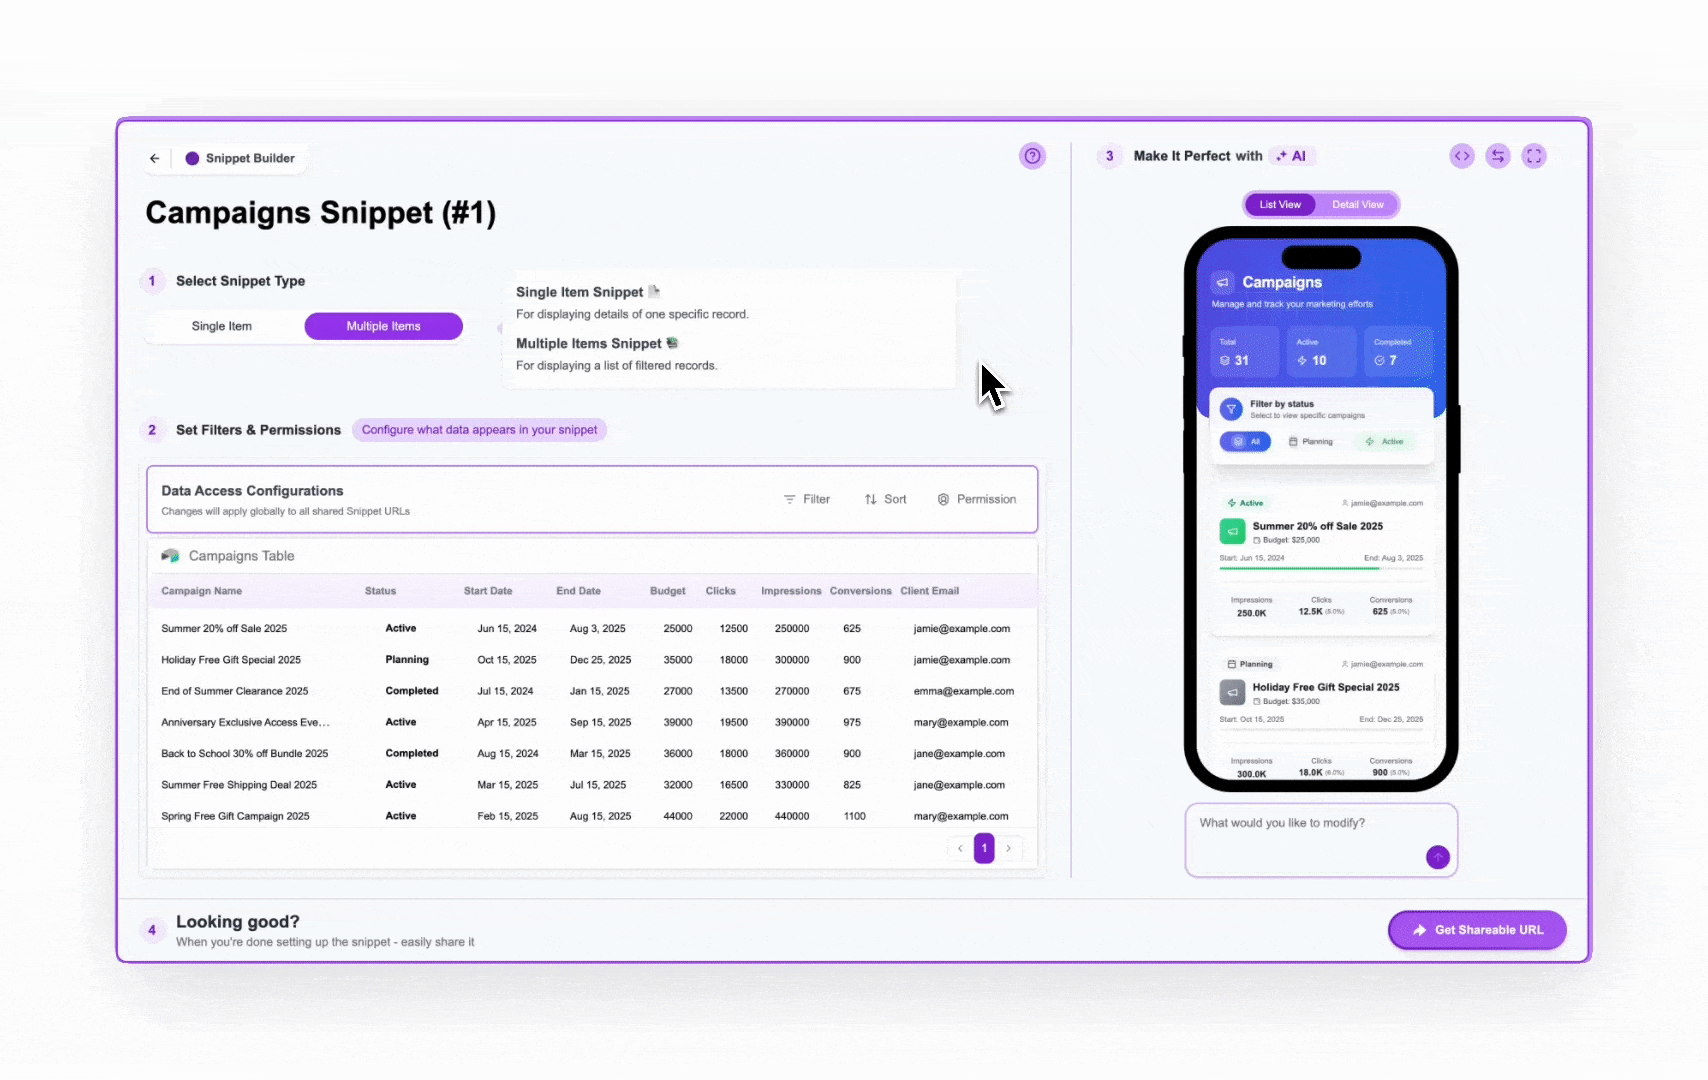
jamie@example.com). The preview will update to show only the campaigns linked to that email address.
Step 7: Share Your Snippet
Once your Multiple Items snippet is configured, you’re ready to share it.- Click the
Get Shareable URLbutton at the bottom.

Creating Direct URL 'Magic' Links
Creating Direct URL 'Magic' Links
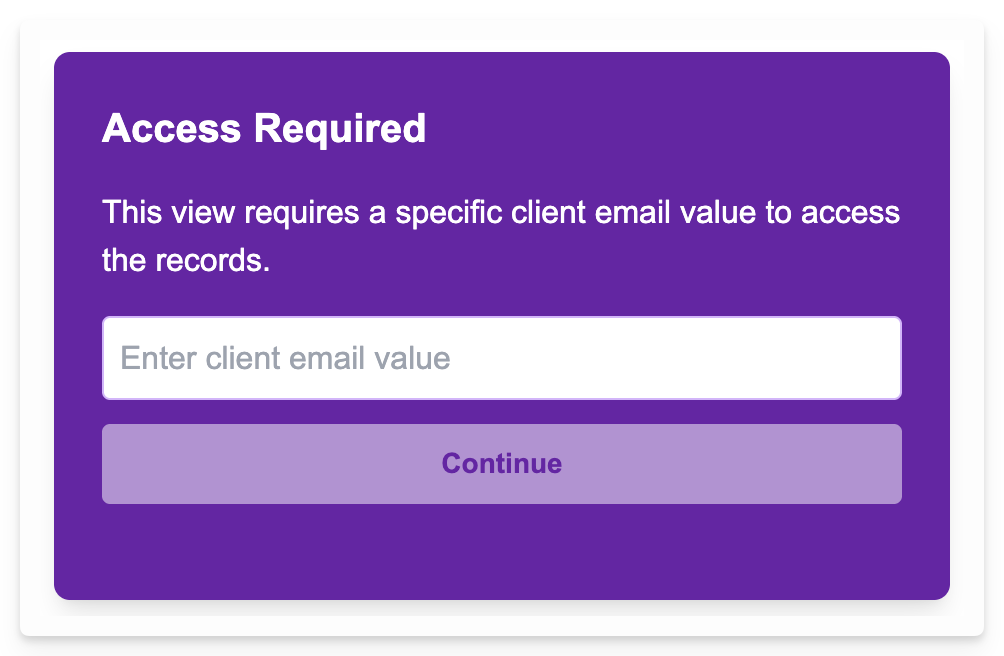
If you want to share a pre-filled ‘Magic Link’ that automatically submits a permission value and filters for a specific user:
- Use the “View as” feature to enter an email
- Click the small ‘Copy Direct URL’ icon next to the email address
Advanced Sharing Options
Advanced Sharing Options
Learn more about the different ways to share snippets and the URL structure: Understanding the Shareable URL Structure and Share a Snippet Directly from Airtable.You can also dynamically generate these URLs for each record in Airtable using a Button field or formula, allowing you to link directly from your base to the relevant snippet view for a client. Learn how on: Share a Snippet Directly from Airtable.These direct URLs can also be used in automation tools like Make or Zapier to automatically send personalized snippet links. Learn how on: Integrate a Snippet in a Make/Zapier Flow
Next Steps
You’ve now successfully built and configured a basic, secure snippet! This quickstart demonstrated the core process. From here, you can explore more advanced features:Refine Design
Customize the look and feel further using AI prompts.
Add Interactivity
Include elements like buttons or checkboxes for user input.
Integrate with Make/Zapier
Use automation tools to dynamically generate personalized snippet links.
Link Snippets Together
Connect different snippets to create complex workflows or portals.
Crust AI provides the flexibility to build simple data displays or complex, interconnected applications powered entirely by your Airtable data, without traditional coding.