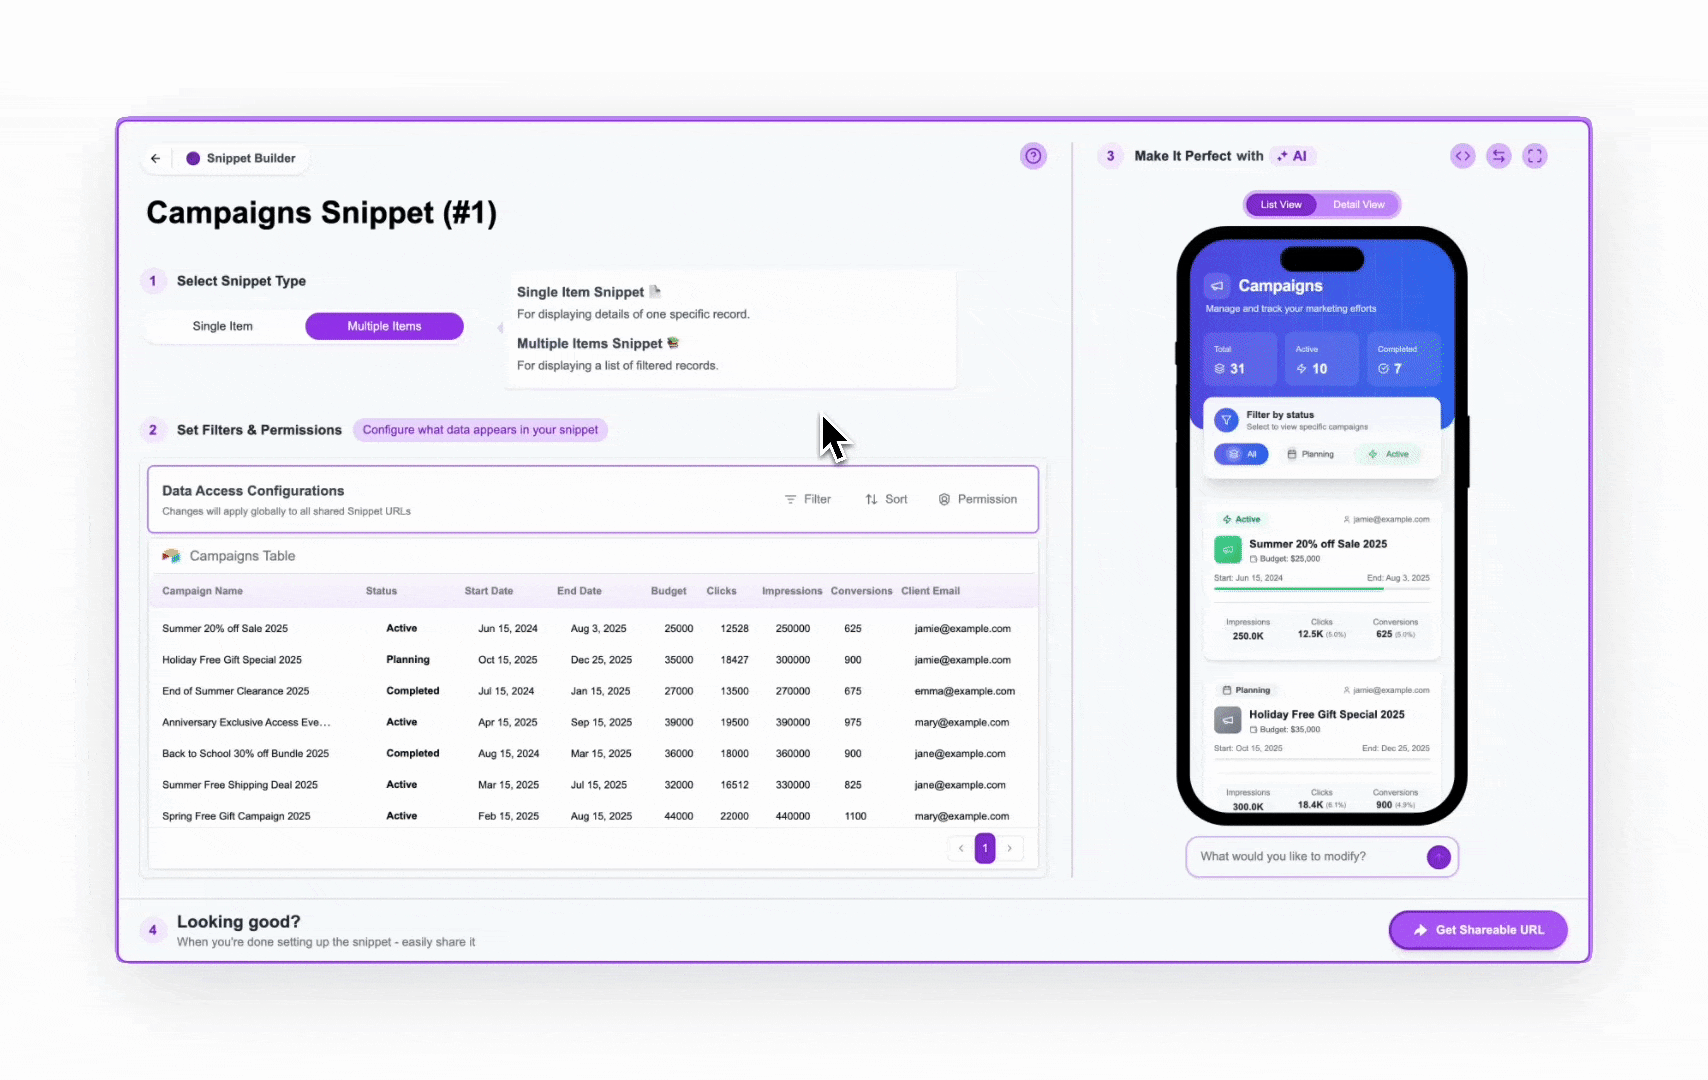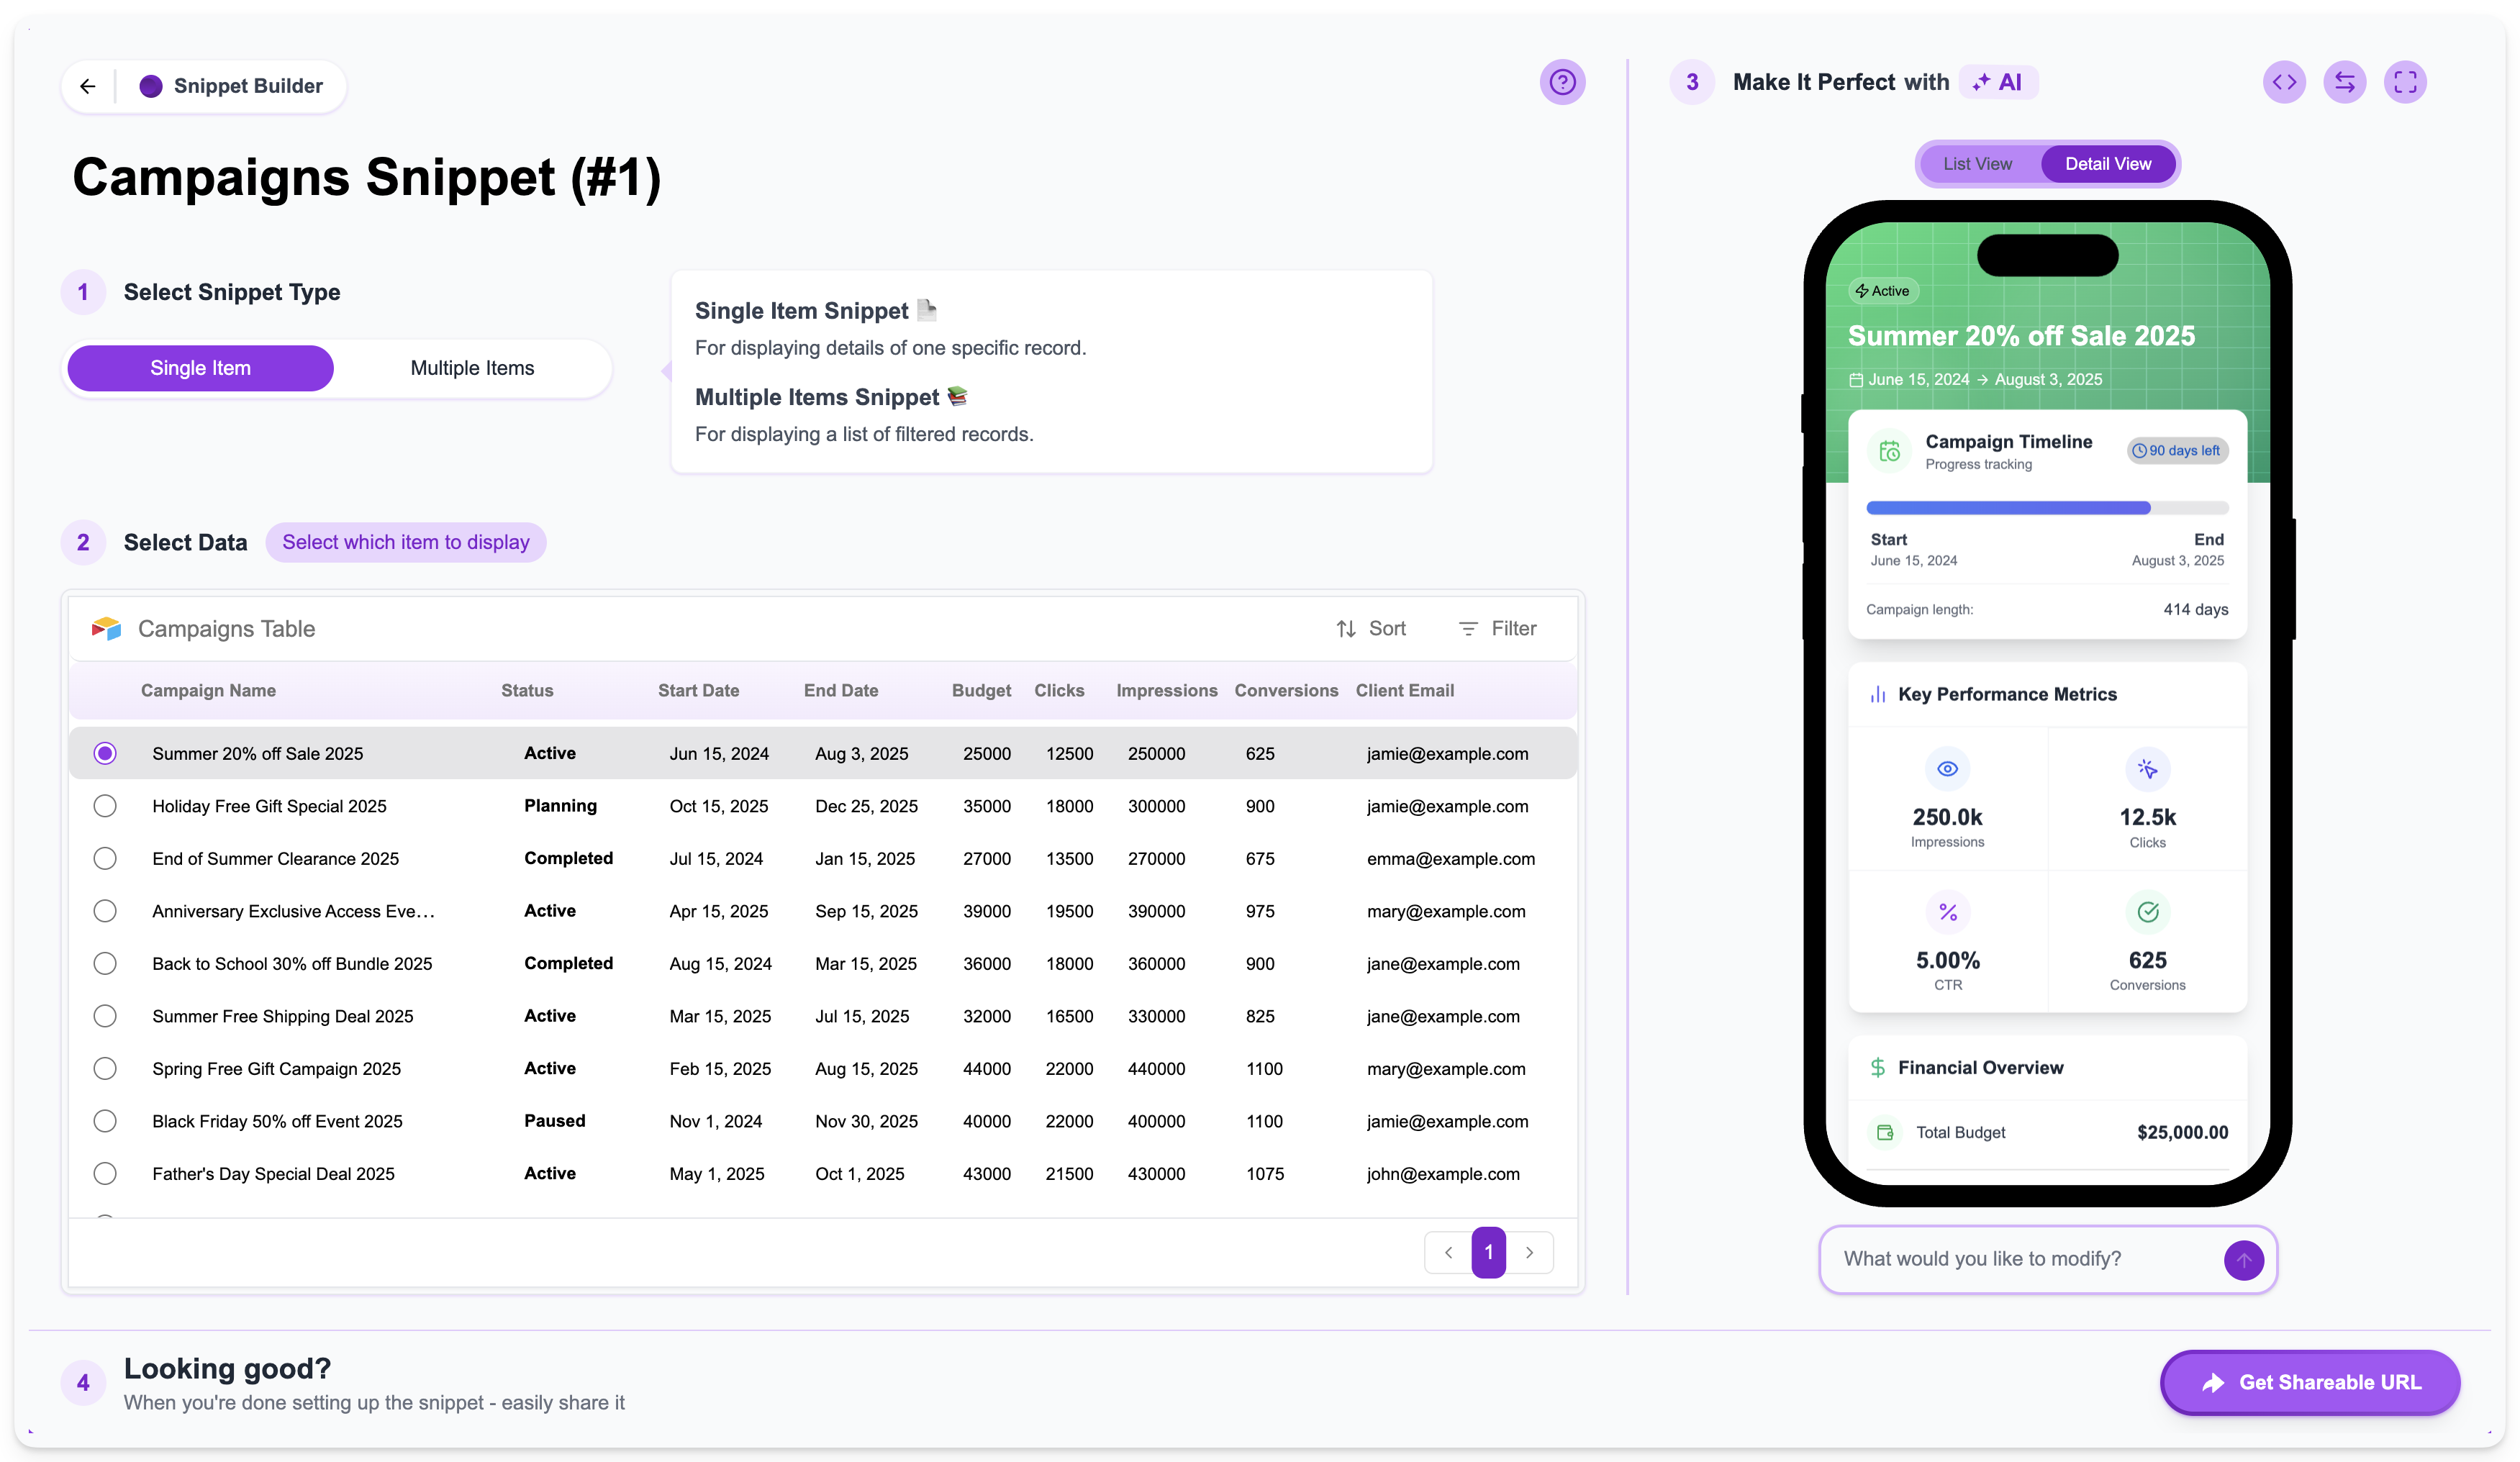
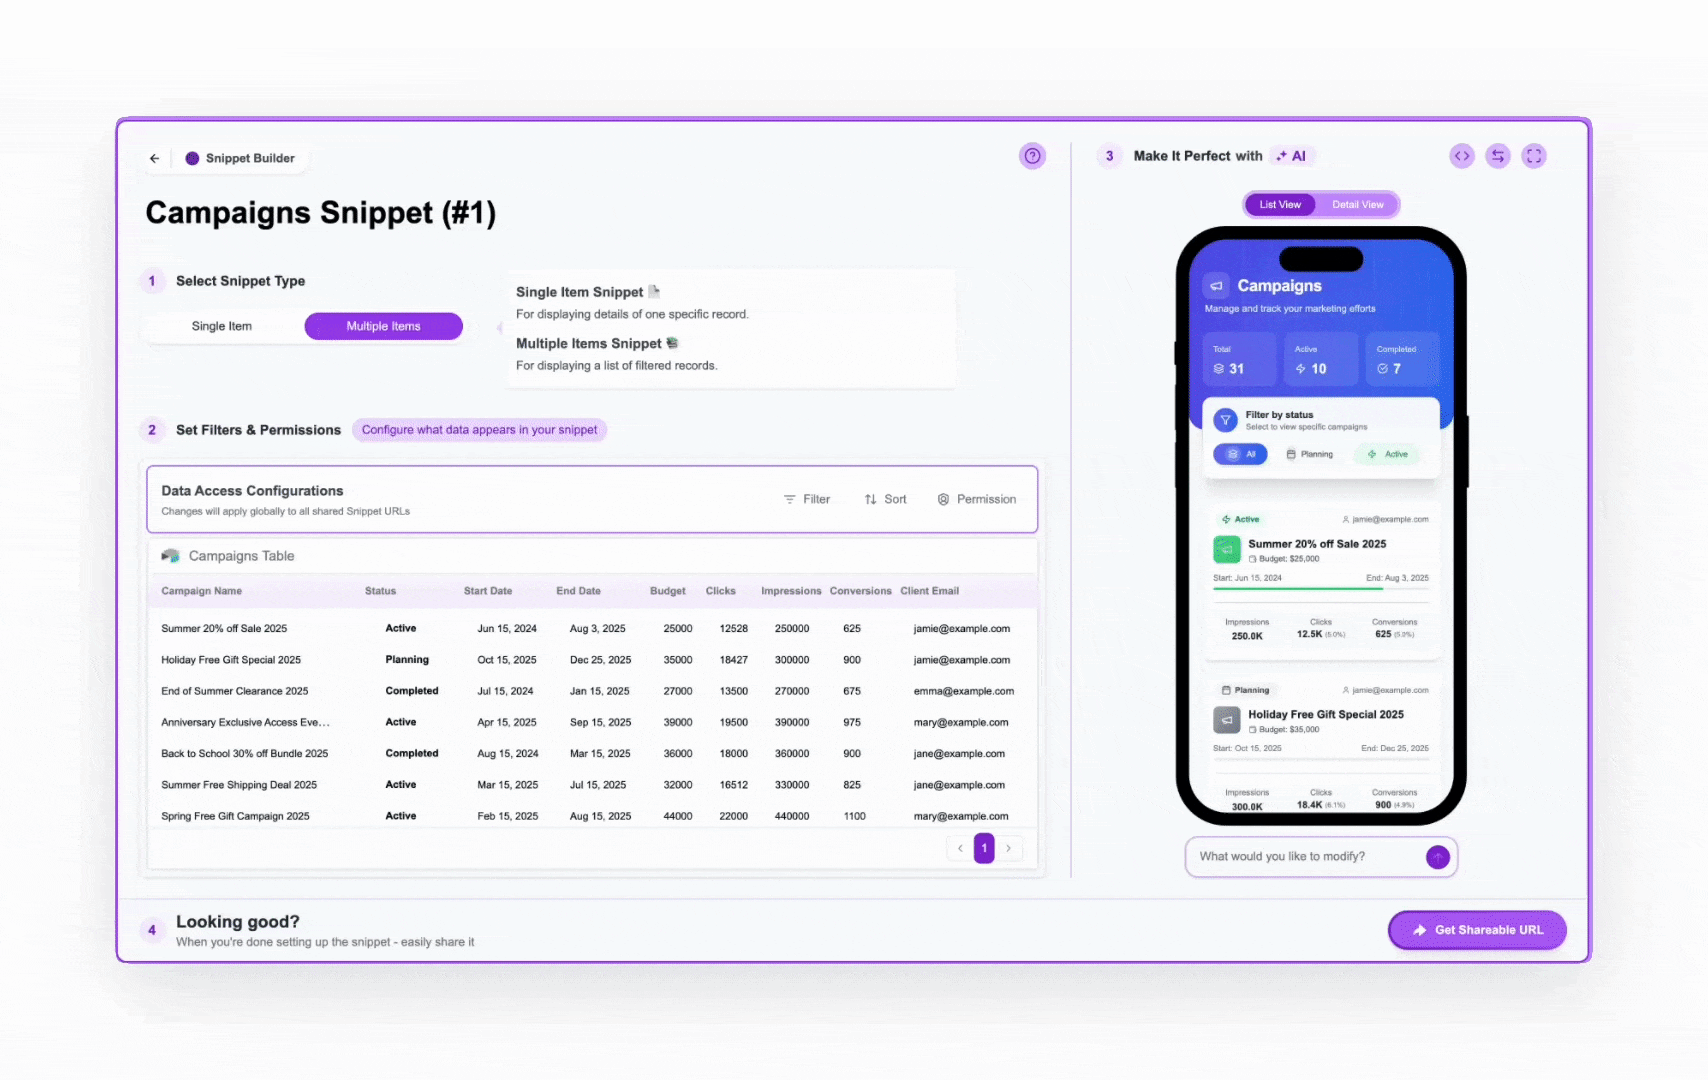
- Select Snippet Type: Choose the fundamental structure of your snippet (Single Item or Multiple Items).
- Select Data / Set Filters & Permissions: Define which data from your selected table will be visible in the snippet and who is allowed to see it.
- Modify and Tweak the UI (“Make It Perfect with AI”): Customize the UI, visual design, layout, and add interactive elements.
- Share (“Looking good?”): Get your shareable URL and distribute your snippet.
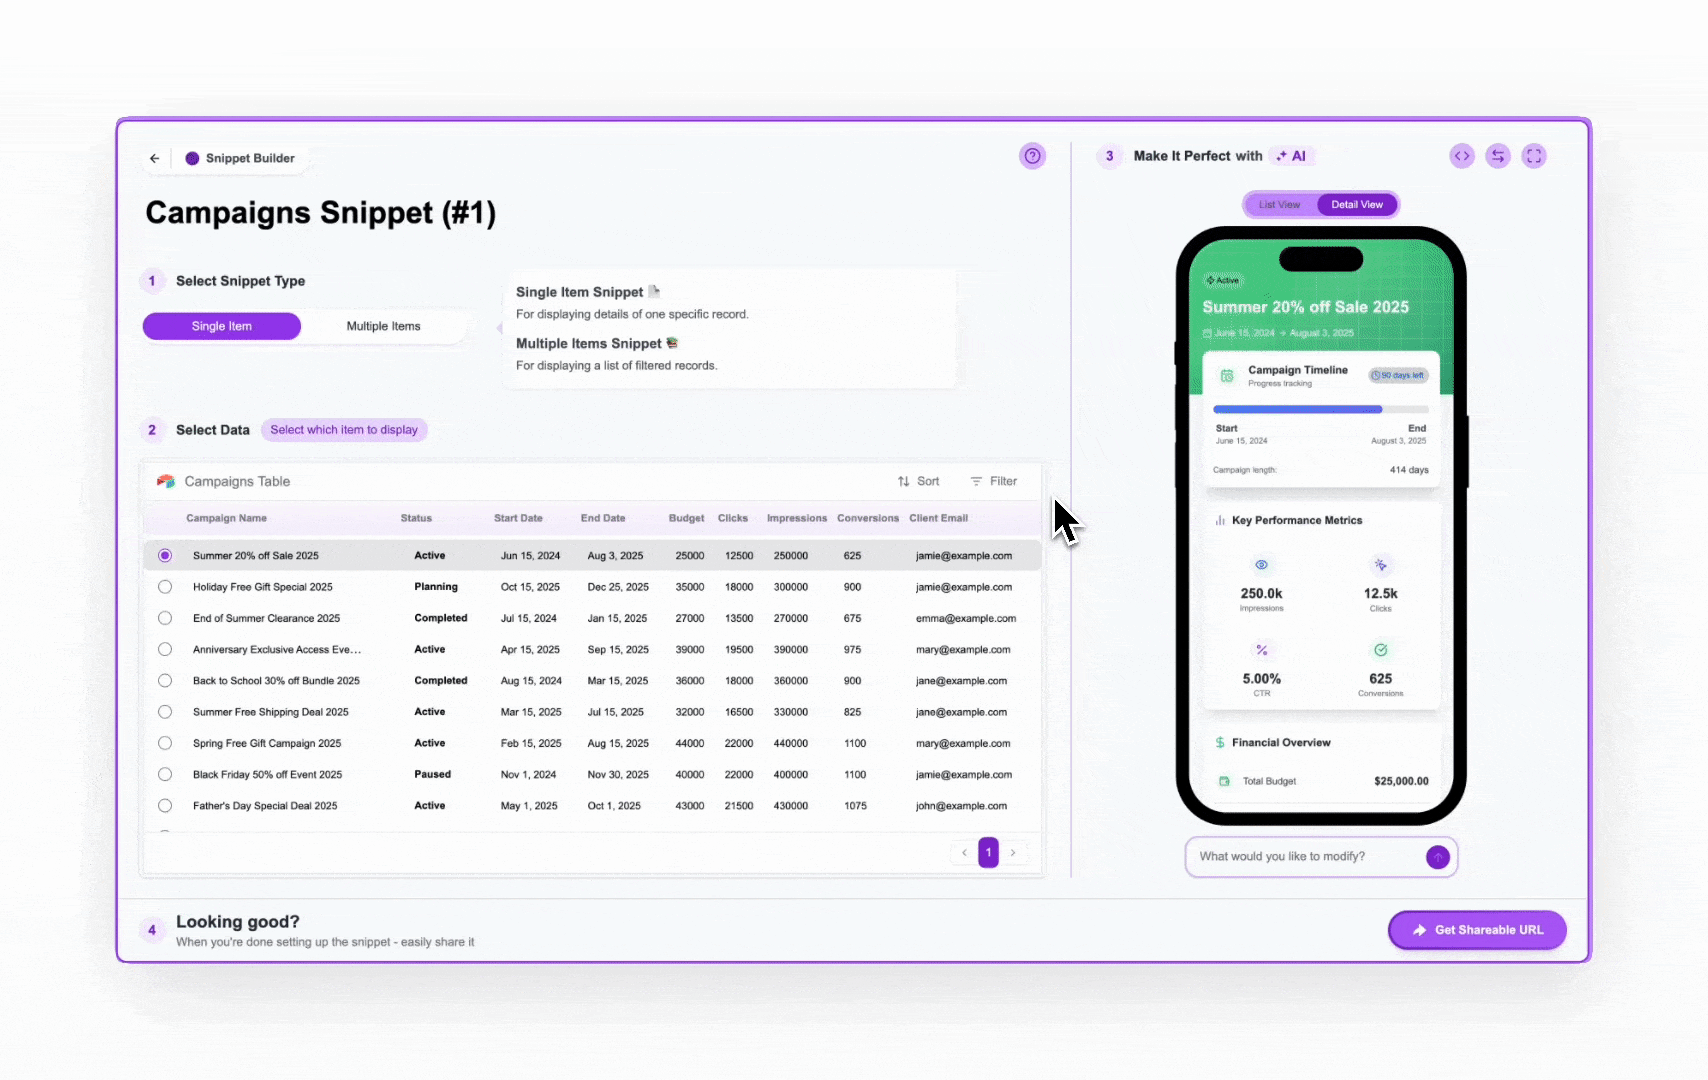
Select Snippet Type
This is the very first step when creating a new snippet. As covered in the Understanding Snippet Types page, you choose between Single Item or Multiple Items.
- Single Item: For displaying detailed information of one specific record.
-
Multiple Items: For displaying a list of filtered records.
Select Data / Set Filters & Permissions
This section is where you see your selected table and determine the data that will populate the snippet. The appearance of this section changes slightly based on whether you chose “Single Item” or “Multiple Items” in Step 1.On the left side, you’ll see a preview of your data directly from the connected table.
- Single Item
- Multiple Items
If you selected Single Item: The table preview will show all records, and you’ll select a specific record using a radio button next to it. The preview on the right will immediately show the Detail View for that chosen record. This selected record will also affect the Shareable URL.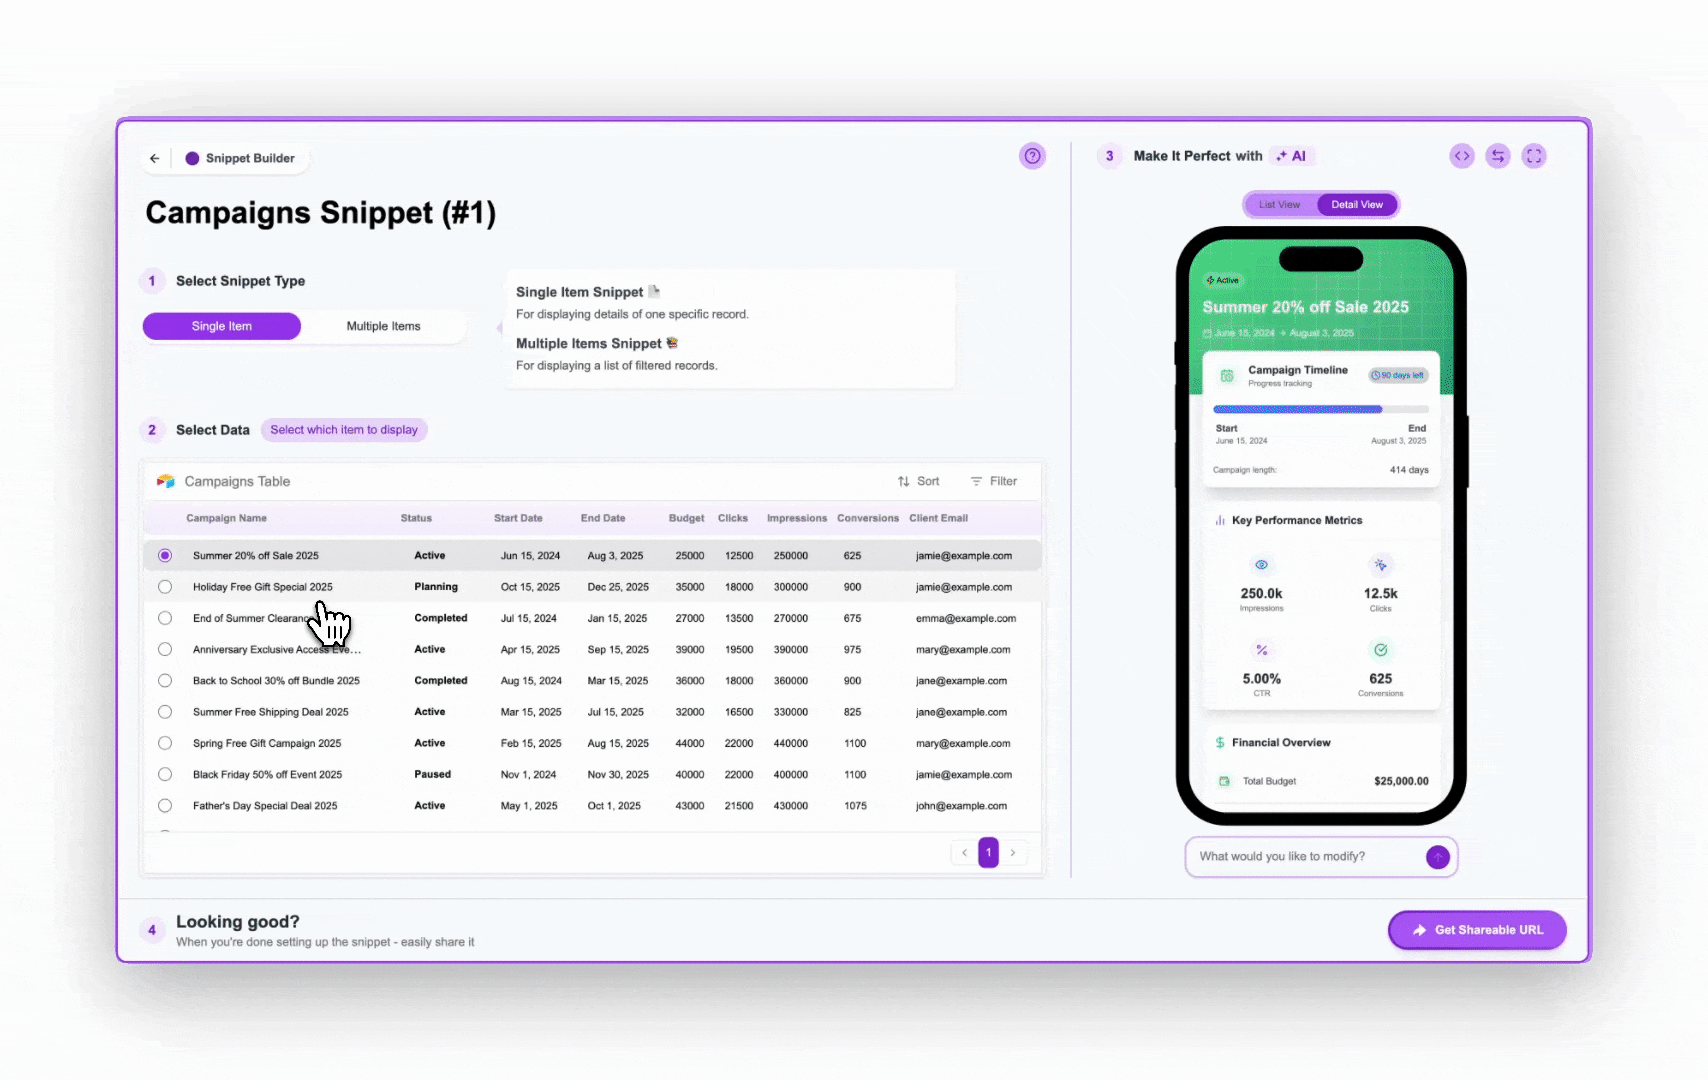

Multi-Items Data Access Configurations
For multi-items snippets only, the controls in this section allow you to specify which data (based on criteria or user identity) will be pulled from the table. It includes:- Filter: Apply static filters to include only records that meet specific conditions (e.g., only show records where “Status is ‘Active’”). These filters apply to anyone viewing the snippet.
- Sort: Define the order in which records appear in the List View of a Multiple Items snippet.
-
Permission: Control who can see the data. This is crucial for implementing user-based filtering.

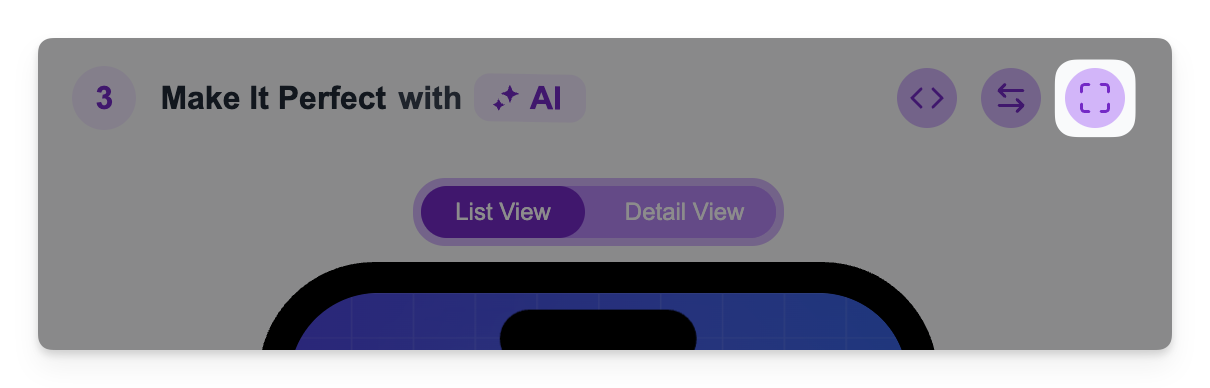
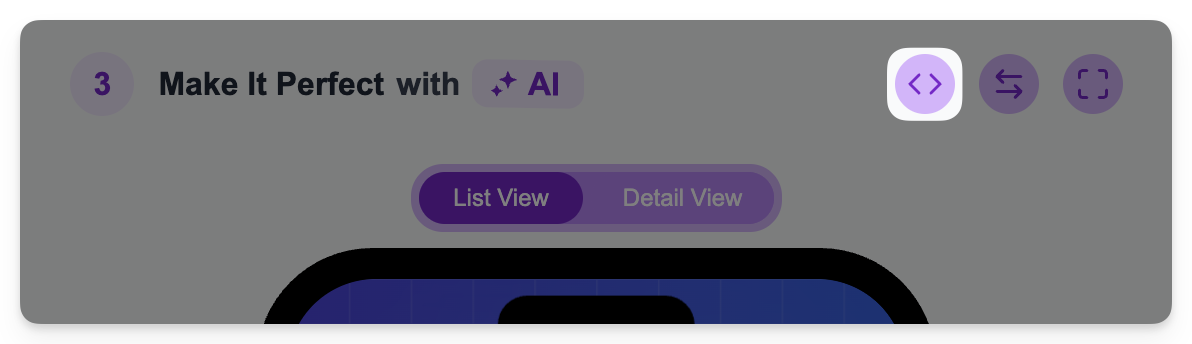
Modify and Tweak the UI ("Make It Perfect with AI")
This step is dedicated to refining the visual appearance (UI/UX) of your snippet and adding interactive elements.The right side prominently features a real-time preview of your snippet, rendered within a phone mockup. This preview updates live as you make design changes.
- For Single Item snippets, only the Detail View is available, as the snippet only displays one record’s full details.
-
For Multiple Items snippets, both List View (showing the list of records) and Detail View (showing the details of a selected record) are available. You can toggle between them here to preview both interfaces. Clicking on an item in the ‘List View’ will automatically navigate to the ‘Detail View’ presenting the selected item.
- Change the design, layout, colors, and other visual styles (e.g., “Make the title font larger”, “Present the status as a chip”, “Change the header color to red”).
- Adjust the layout and arrangement of elements (e.g., “Move the budget above the dates”).
- Add interactive elements like buttons or checkboxes (“Allow the user to edit the status using a dropdown”)
-
Control record fields visibility (“Hide the ‘Admin Notes’ field”)
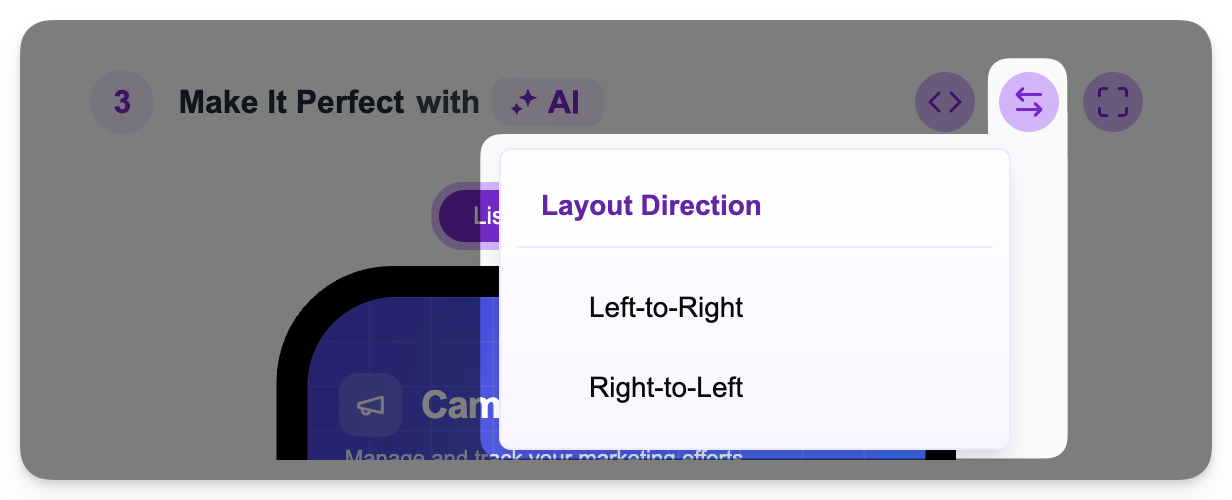
Additional Controls
Full Screen Preview: Use the full screen button to view the snippet preview in a larger format and see how it renders on a desktop screen as well as mobile.Share ("Looking good?")
Once you’re satisfied with your snippet’s data and design, this final section allows you to get the URL and share it.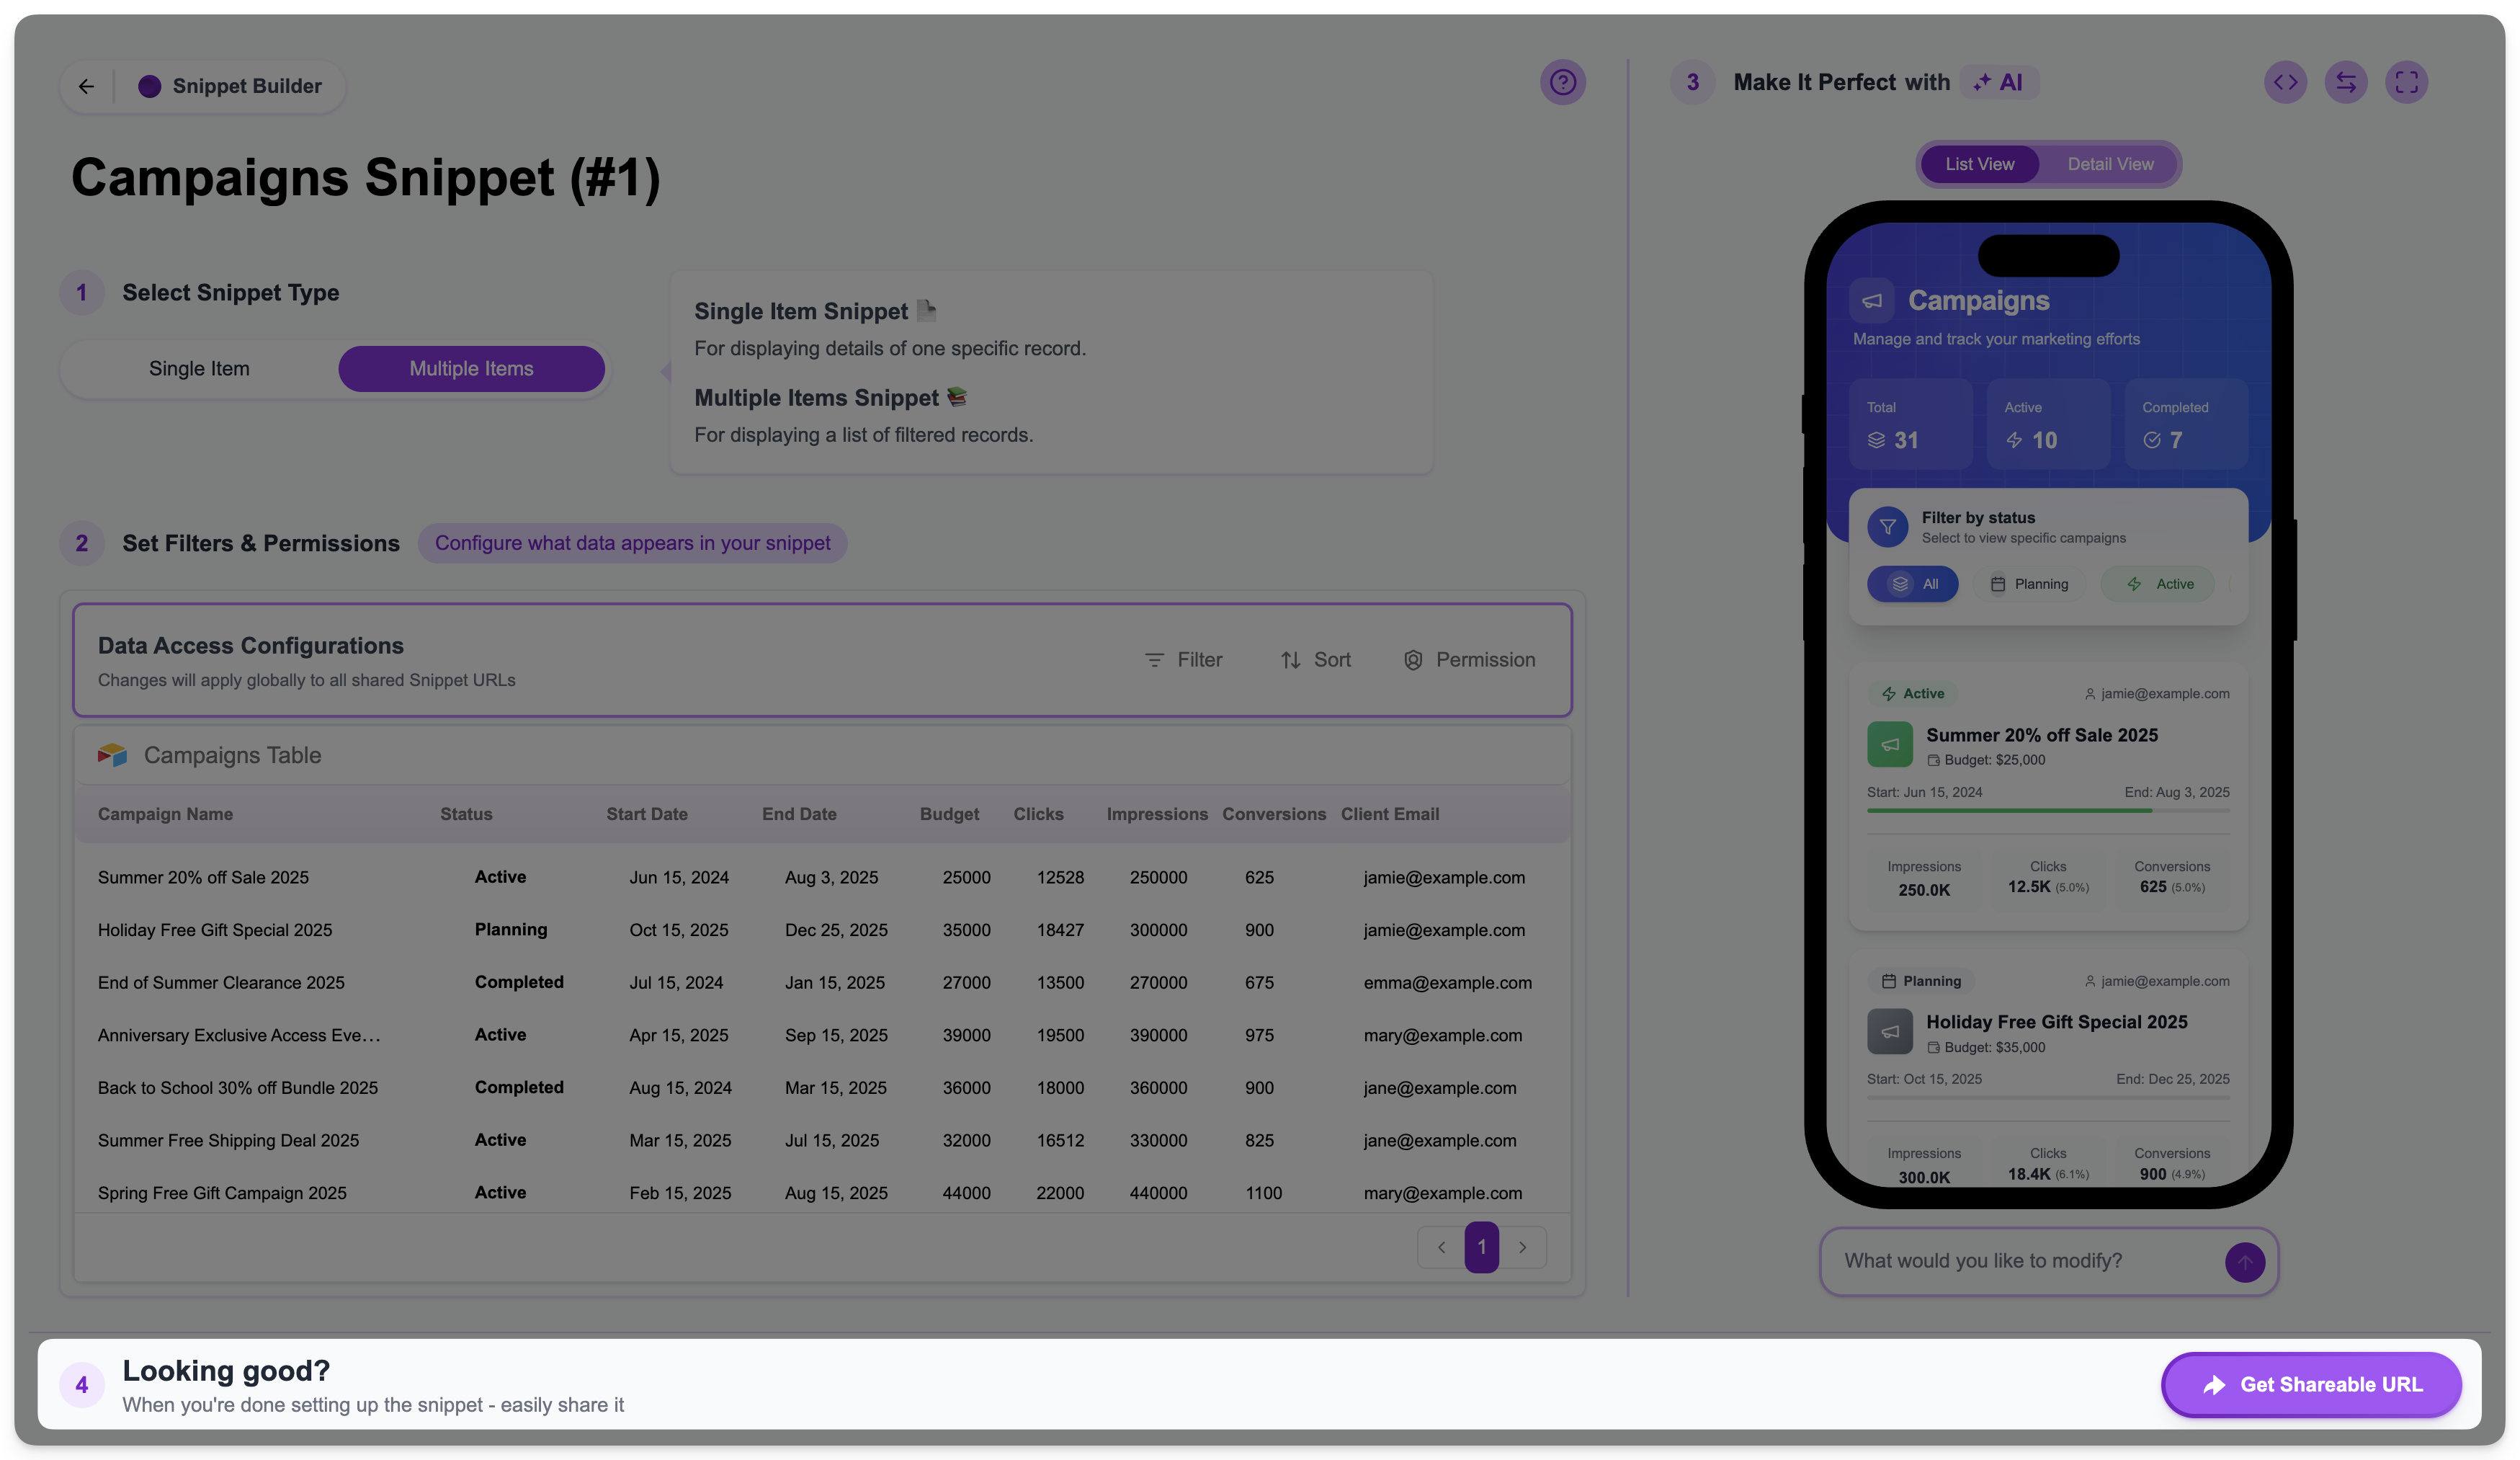
Get Shareable URL button. Depending on your snippet’s type and permission settings, you’ll get different URL options. To learn more about how this works, see: Understanding the Shareable URL StructureYou can share these URLs directly or integrate them into Airtable/Notion/Monday.com buttons, automations (Make/Zapier), or other tools.Learn more about integrating snippets into workflows: Share a Snippet Directly from Airtable and Integrate a Snippet in a Make/Zapier FlowRenaming a Snippet
You can rename the snippet by clicking the snippet name and typing the new name.