> ## Documentation Index
> Fetch the complete documentation index at: https://docs.trycrust.ai/llms.txt
> Use this file to discover all available pages before exploring further.
# User-Based Permission Explained
> Learn how to dynamically show only the records relevant to the specific individual viewing the snippet using User-based Permission.
**Personalized Data Access**\
As discussed in [Understanding the Permission Mechanism](/chapters/controlling-data-access/understanding-the-permission-mechanism), you might not want every viewer to see the entire list.\
**User-based Permission** allows you to dynamically show only the records relevant to the *specific individual* viewing the snippet.
While [**Static Filters**](/chapters/selecting-which-data-to-display/setting-filters-and-sorting-for-multiple-items-snippets) can narrow down the list for *everyone*, user-based permission is the key to building secure, personalized experiences like client portals or vendor dashboards using a single, manageable snippet.
## How User-Based Permission Filters Data
Enabling User-based Permission essentially adds a dynamic filter layer on top of any static filters you've applied. Here's the process:
#### The Permission Process
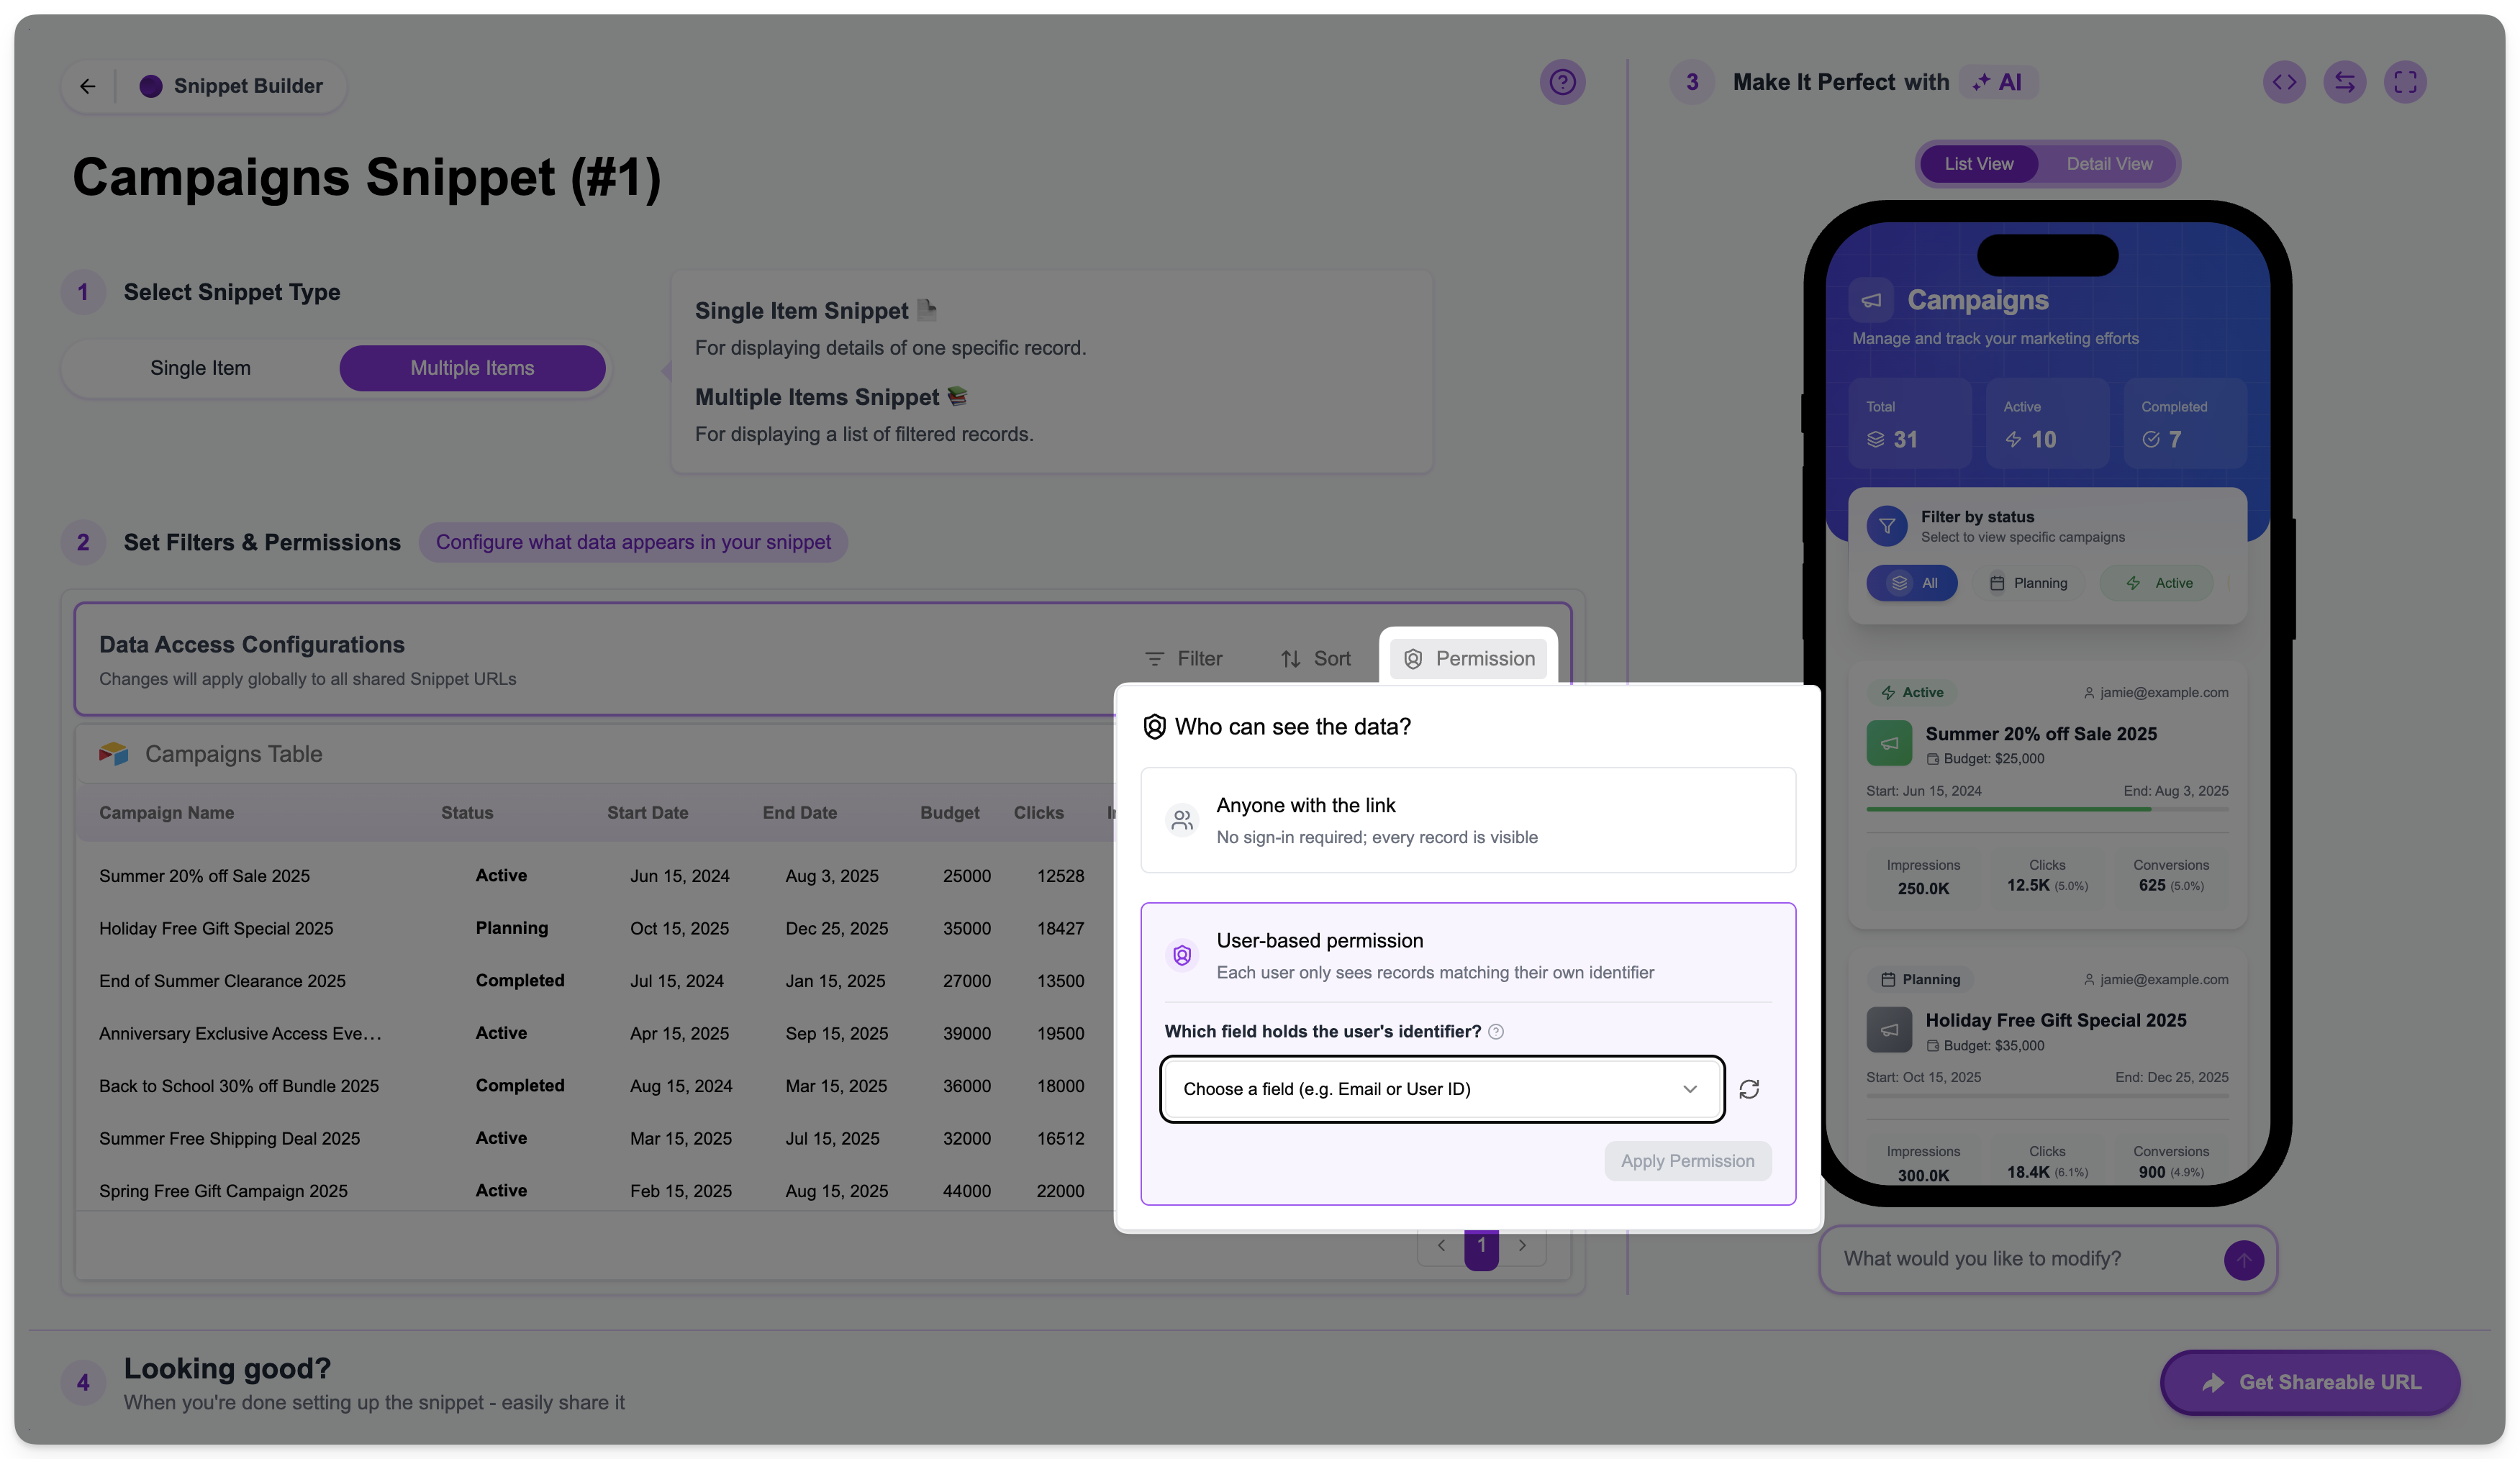
In **Step 2** of the Snippet Builder, select the **"User-based permission"** option. Then, choose a specific field from your table using the dropdown. This chosen **Permission Field** must contain a value that uniquely identifies the viewer (e.g., their email, a unique ID, a phone number).
When someone accesses the snippet's URL, Crust AI needs to determine *their* unique identifier value (the **Permission Value**). This happens in one of two ways:
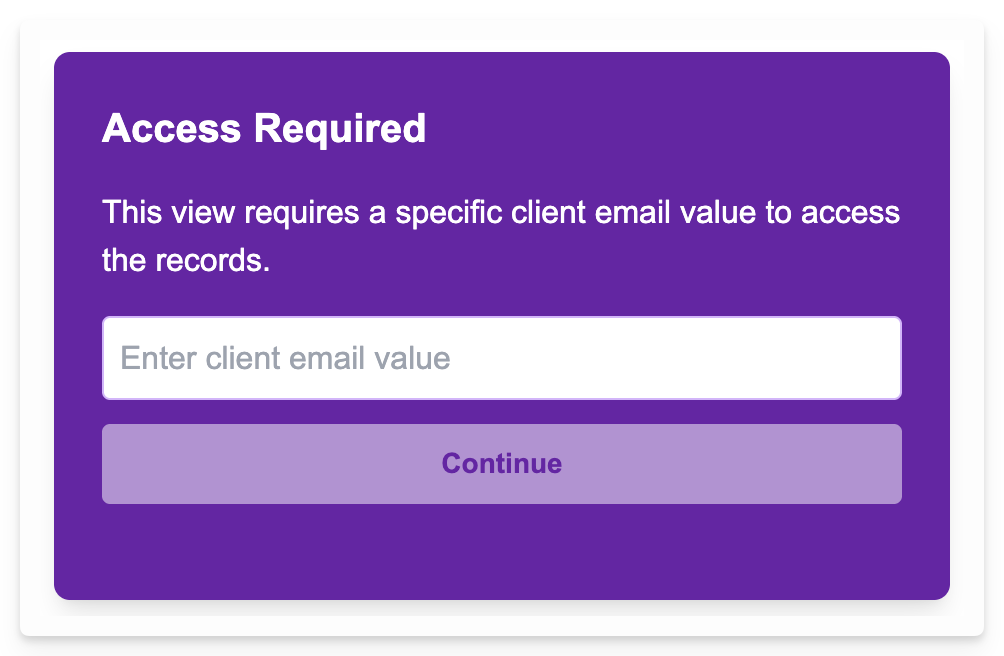
If the viewer accesses the generic Shareable URL (copied from the main "Get Shareable URL" button in Step 4), and the URL *doesn't* contain a pre-filled identifier, Crust AI will present an "Access Required" screen, prompting the viewer to enter their specific value (e.g., "Enter your Client Email").
If the viewer accesses a "Direct URL" (typically generated using the "View as" feature in the builder or constructed via automation), the URL will contain a `?p=` parameter followed by the viewer's identifier (e.g., `?p=client@email.com` or `?p=recABCXYZ`). Crust AI uses this value directly, bypassing the "Access Required" screen.
Crust AI takes the obtained Permission Value and compares it against the values in the configured Permission Field for *all* records in your table (that have already passed any static filters).
Only the records where the value in the Permission Field **exactly matches** the viewer's Permission Value are displayed in the snippet's List View.
***
## Choosing the Right Permission Field
Selecting the correct field in your table to use as the Permission Field is crucial.
* **Requirement:** The field must exist *within the table the snippet is based on*.
* **Identifier:** The value in this field should uniquely identify the user or entity you want to grant access to.
* **Common Use Cases:** Email address is often convenient, but consider security implications (covered below).
***
## Handling Linked Record Identifiers (Using Lookup Fields)
A very common scenario is that the unique identifier you want to use (like a Client's Email) isn't directly in the table your snippet is based on (e.g., the "Campaigns" table). Instead, it's in a linked table (e.g., a "Clients" table).
**Important Limitation**\
Crust AI's User-based Permission **cannot directly use a Linked Record field** as the Permission Field. You need to bring the identifier *into* the table the snippet is based on.
The standard Airtable/Notion/Monday.com solution for this is a \*\*Lookup Field \*\*('Mirror' field for Monday.com). A Lookup field pulls specific information from a linked record into the current table.
### Example: Setting Permission by Client Email (via Lookup)
Let's adapt our marketing campaign example. Assume:
* Your snippet is based on the **Campaigns** table.
* The Campaigns table has a **Client** field (Linked Record type) linking to your **Clients** table.
* The **Clients** table has an **Email** field (Email type).
To set permission based on the Client's Email in your Campaigns snippet:
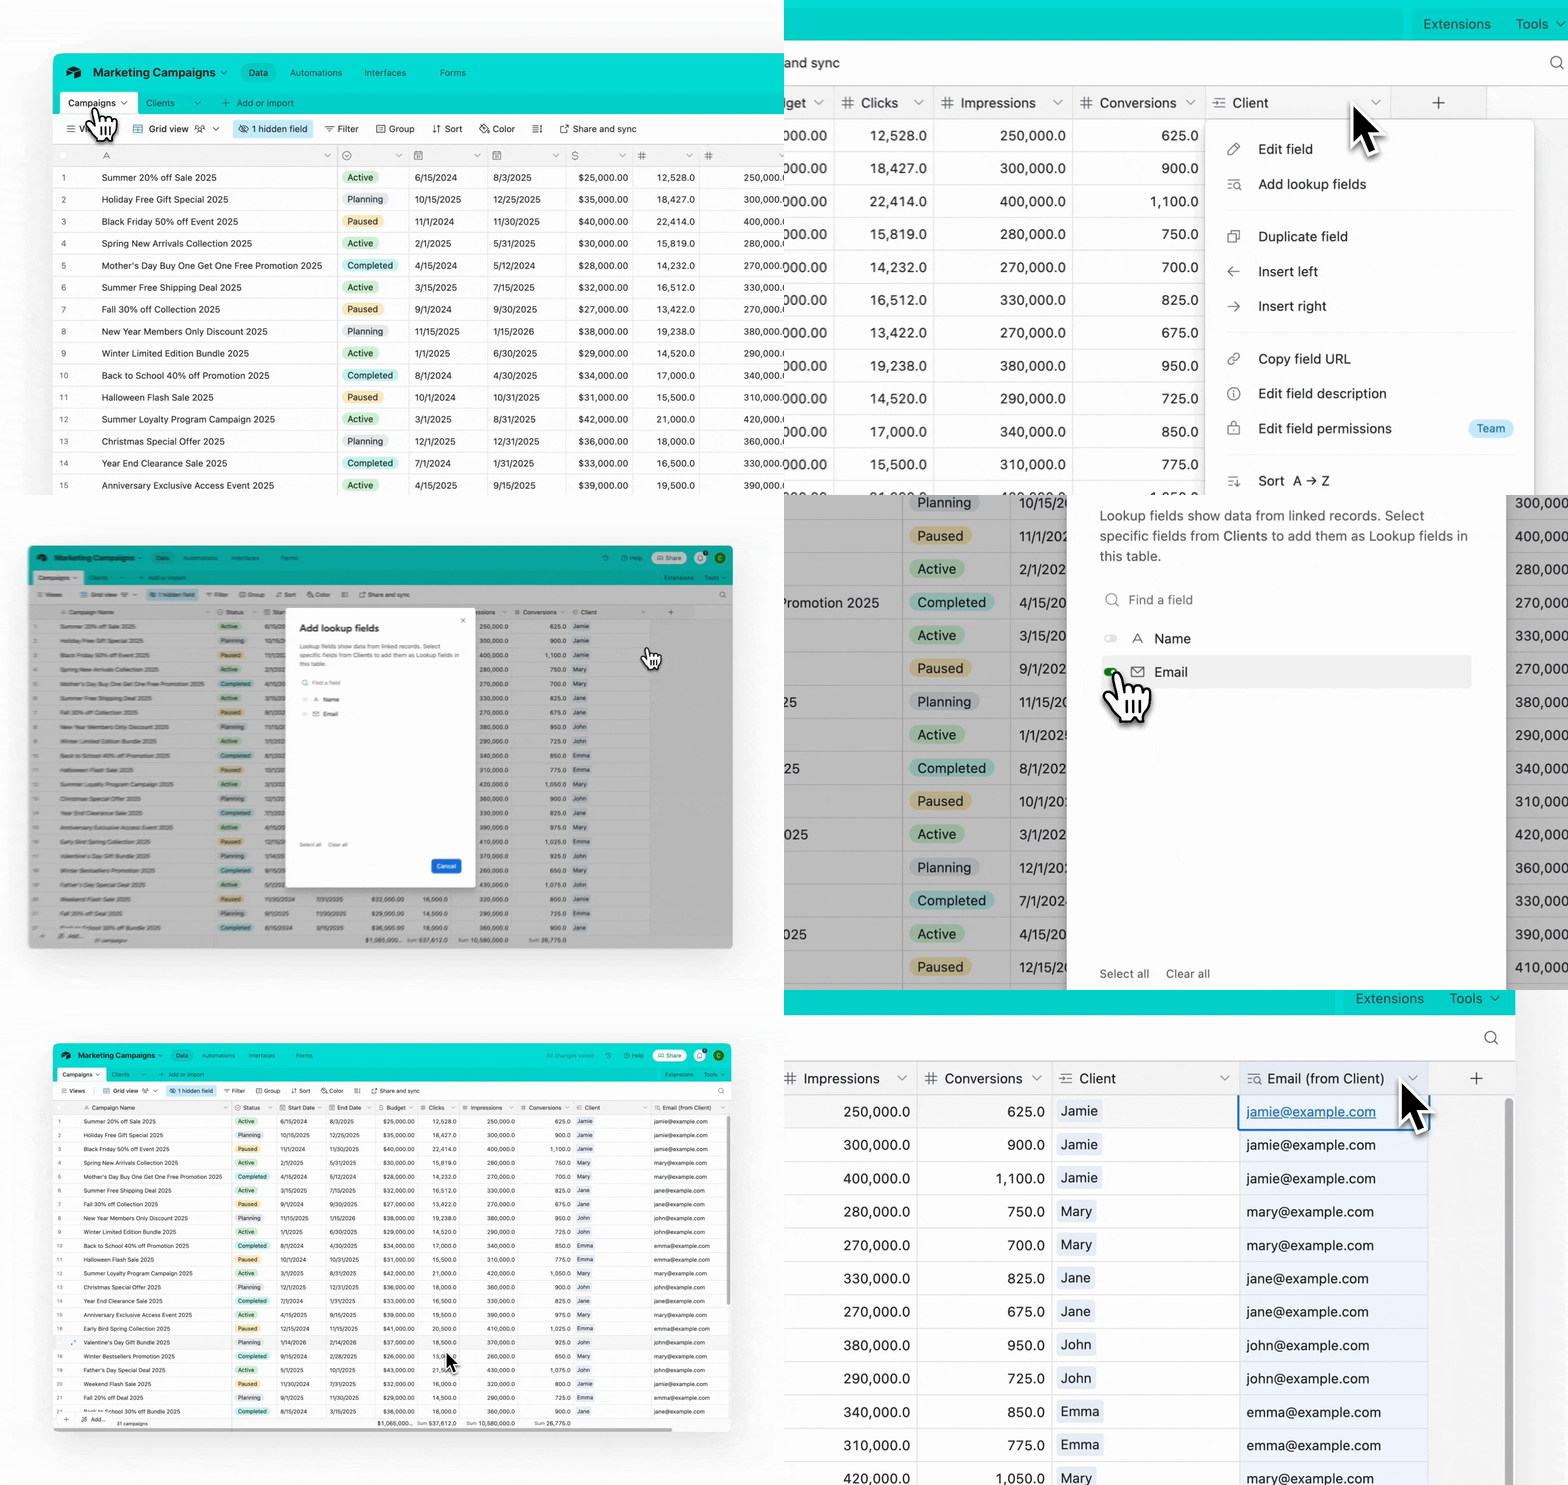
Go to your **Campaigns** table. Add a new **Lookup** field. Configure it:
* Right click on the \*\*Client \*\*field (Linked Record)
* Choose **Add lookup fields**
* Check the **Email** field
* This creates a field called **Email (from Client)** that shows the linked client's email on each campaign record.
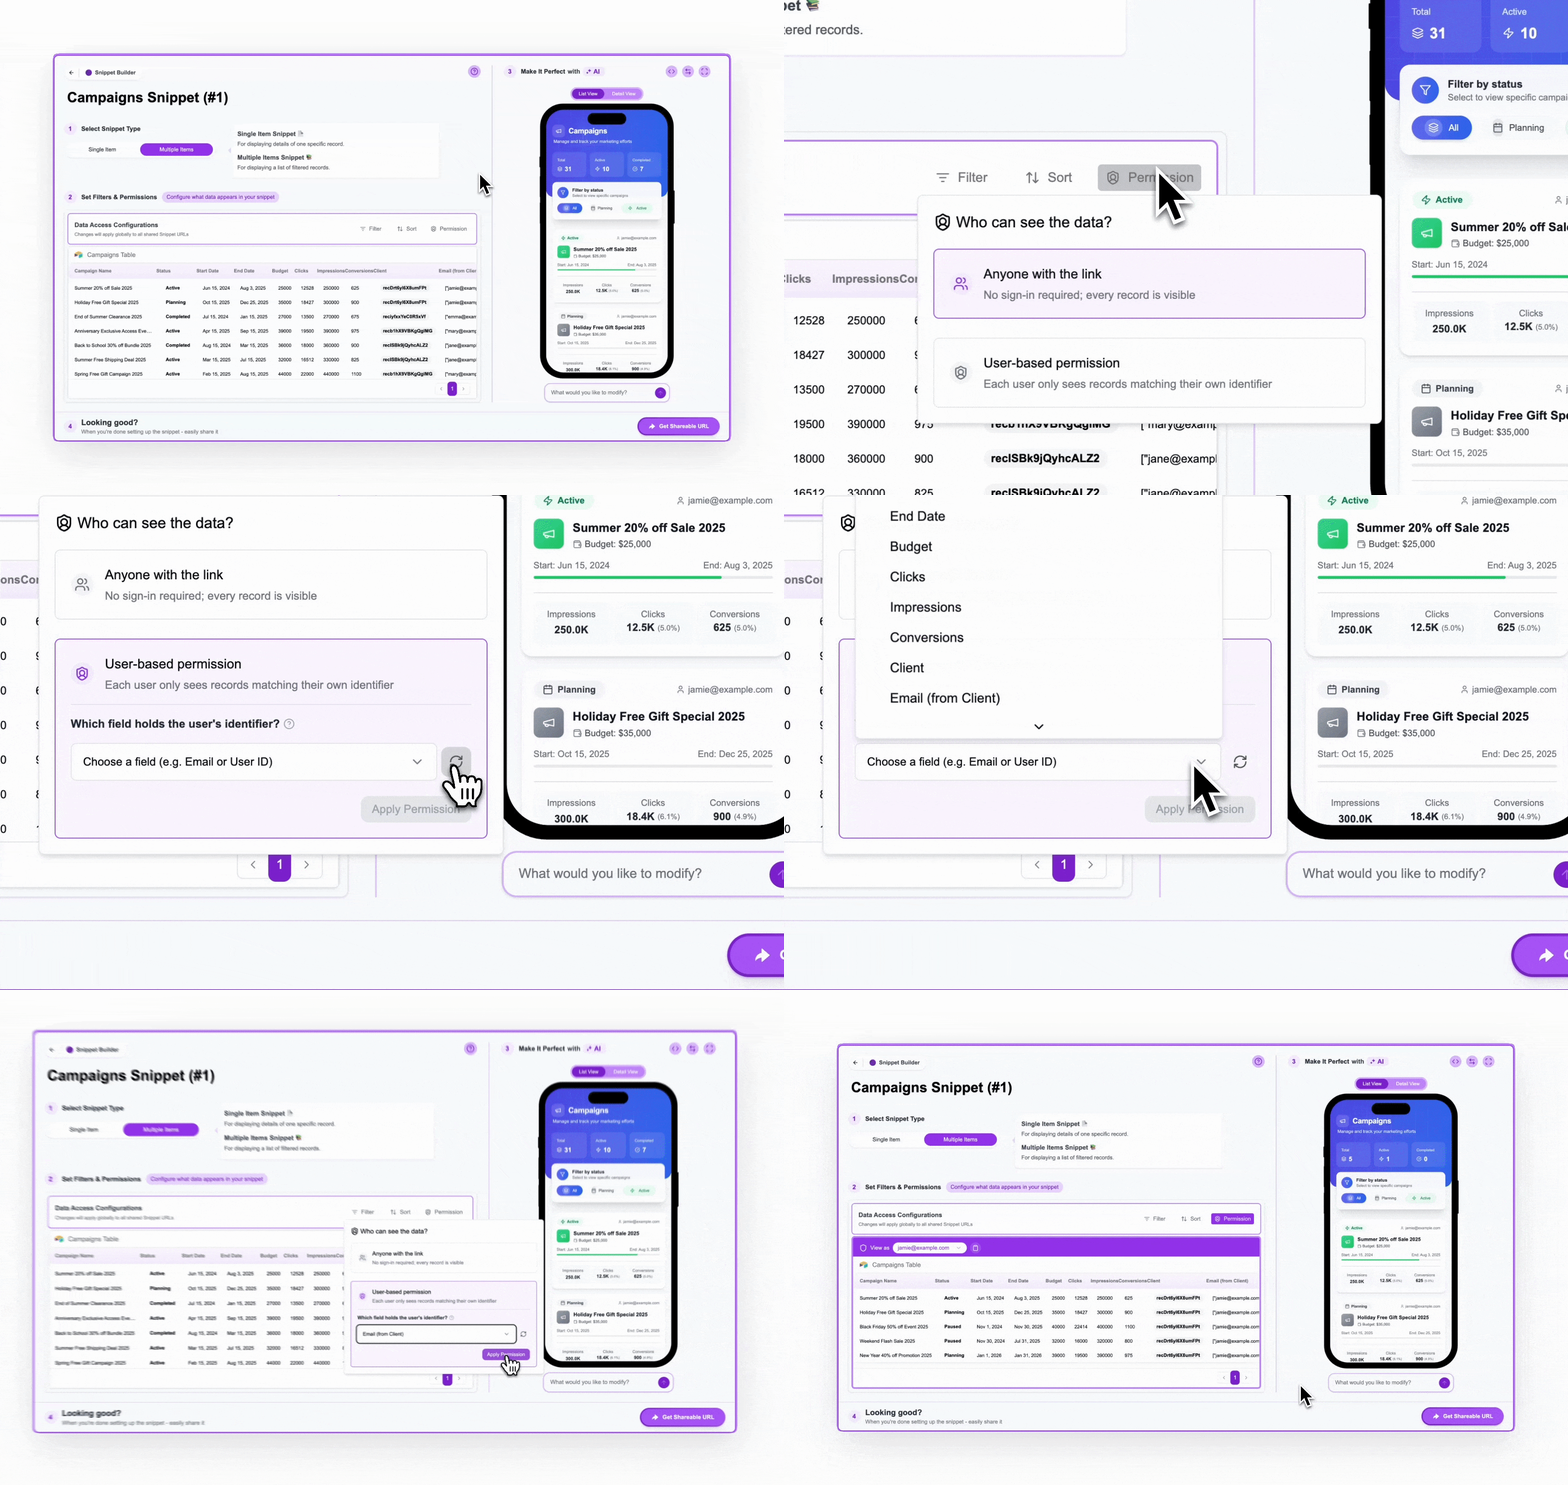
Go back to your Campaigns snippet in the Crust AI Builder (refresh if needed). Navigate to **Step 2 -> Permission**.
* Select **User-based permission**.
* In the "Which field holds the user's identifier?" dropdown, select your new **"Email (from Client)"** field.
* Click **Apply Permission**.
Now, the snippet will correctly filter campaigns based on the email address entered by the viewer or provided in the URL, matching it against the email pulled in via the Lookup field.
***
## Enhancing Security: Using Record IDs
While using email is common, if security is paramount and you worry clients might guess each other's emails, you can use a less guessable unique identifier like the Airtable **Record ID** of the client.
### Example: Setting Permission by Client Record ID (via Formula & Lookup)
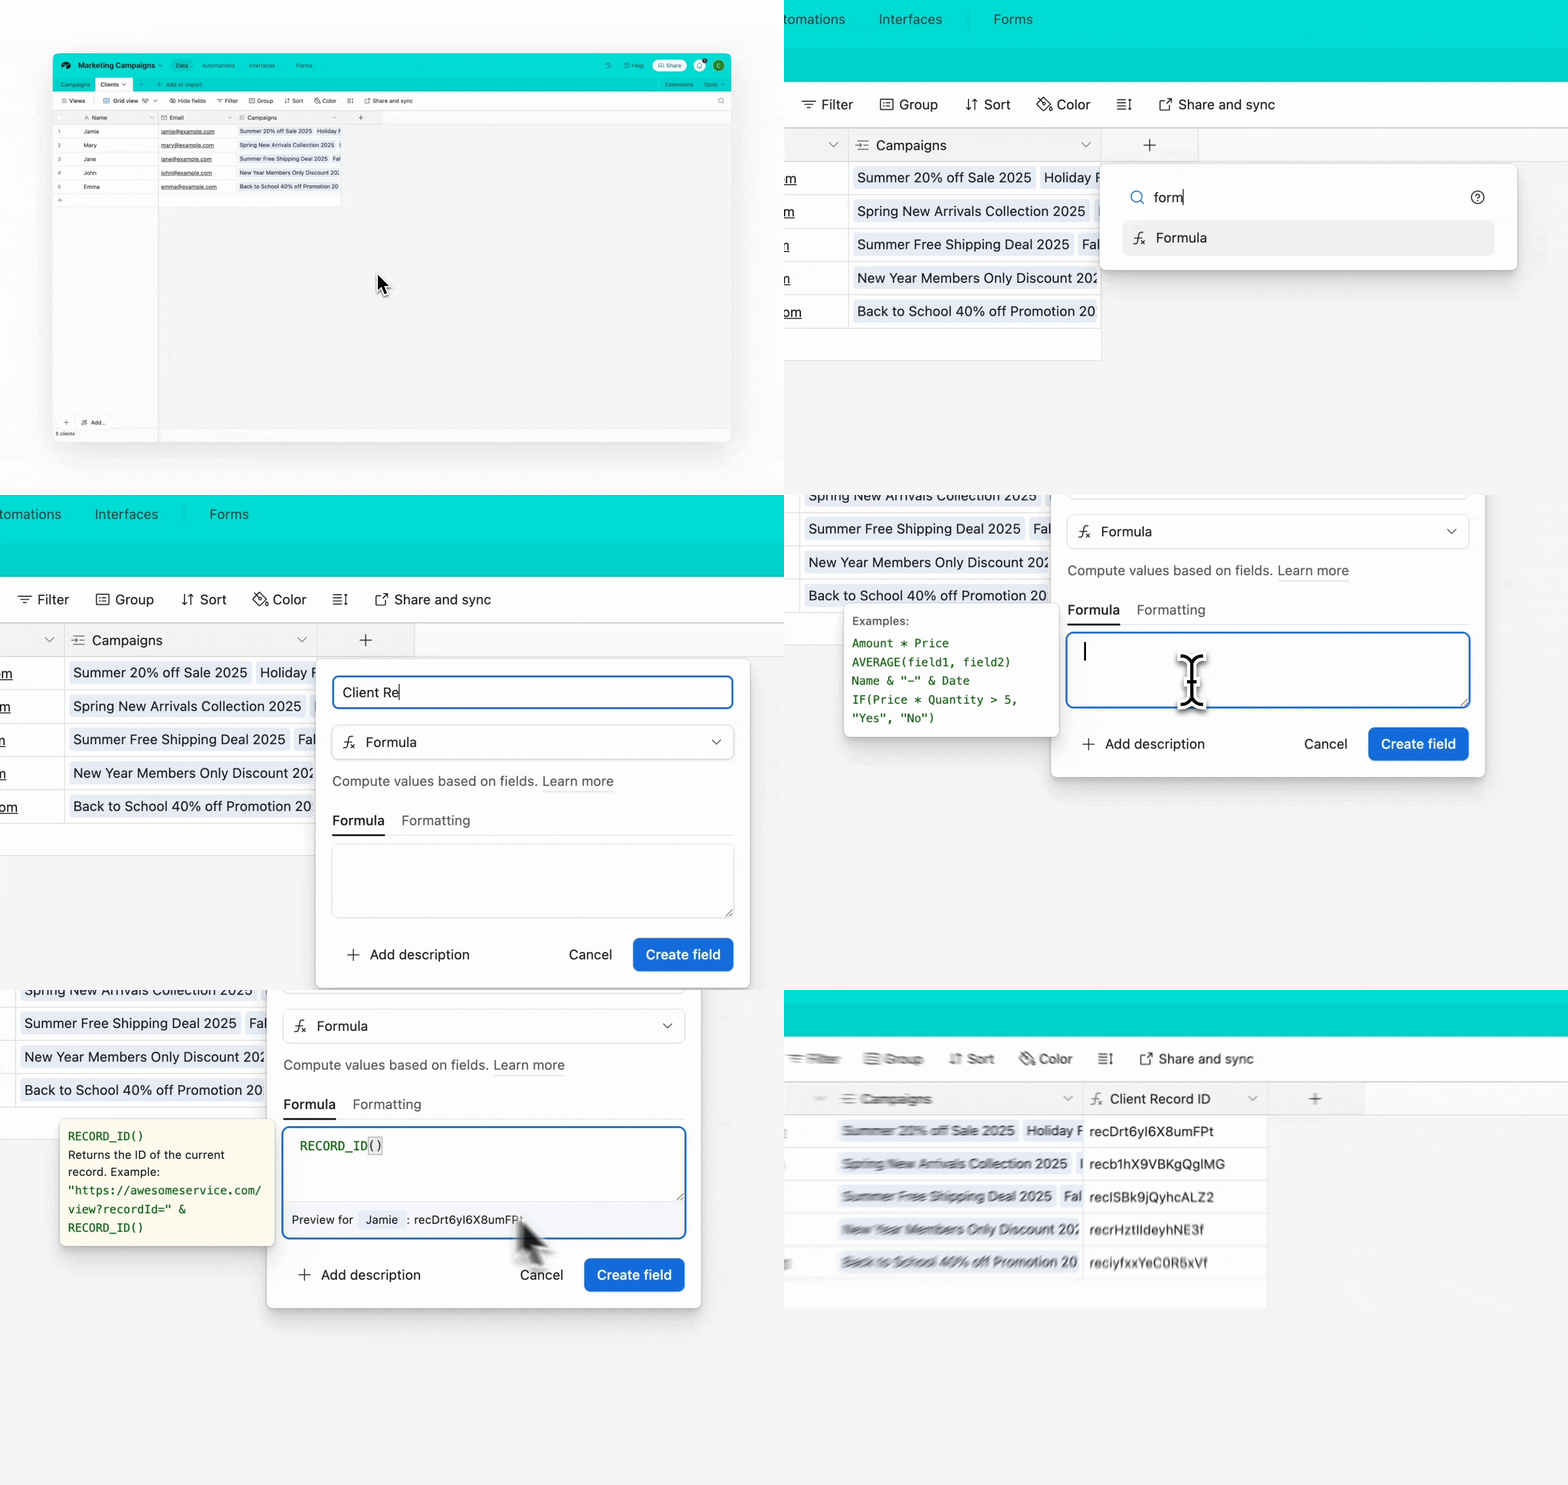
Go to your **Clients** table. Add a new **Formula** field.
* Enter the formula: `RECORD_ID()`
* Name it: `Client Record ID`. Save it.
This field now displays the unique Airtable Record ID for each client.
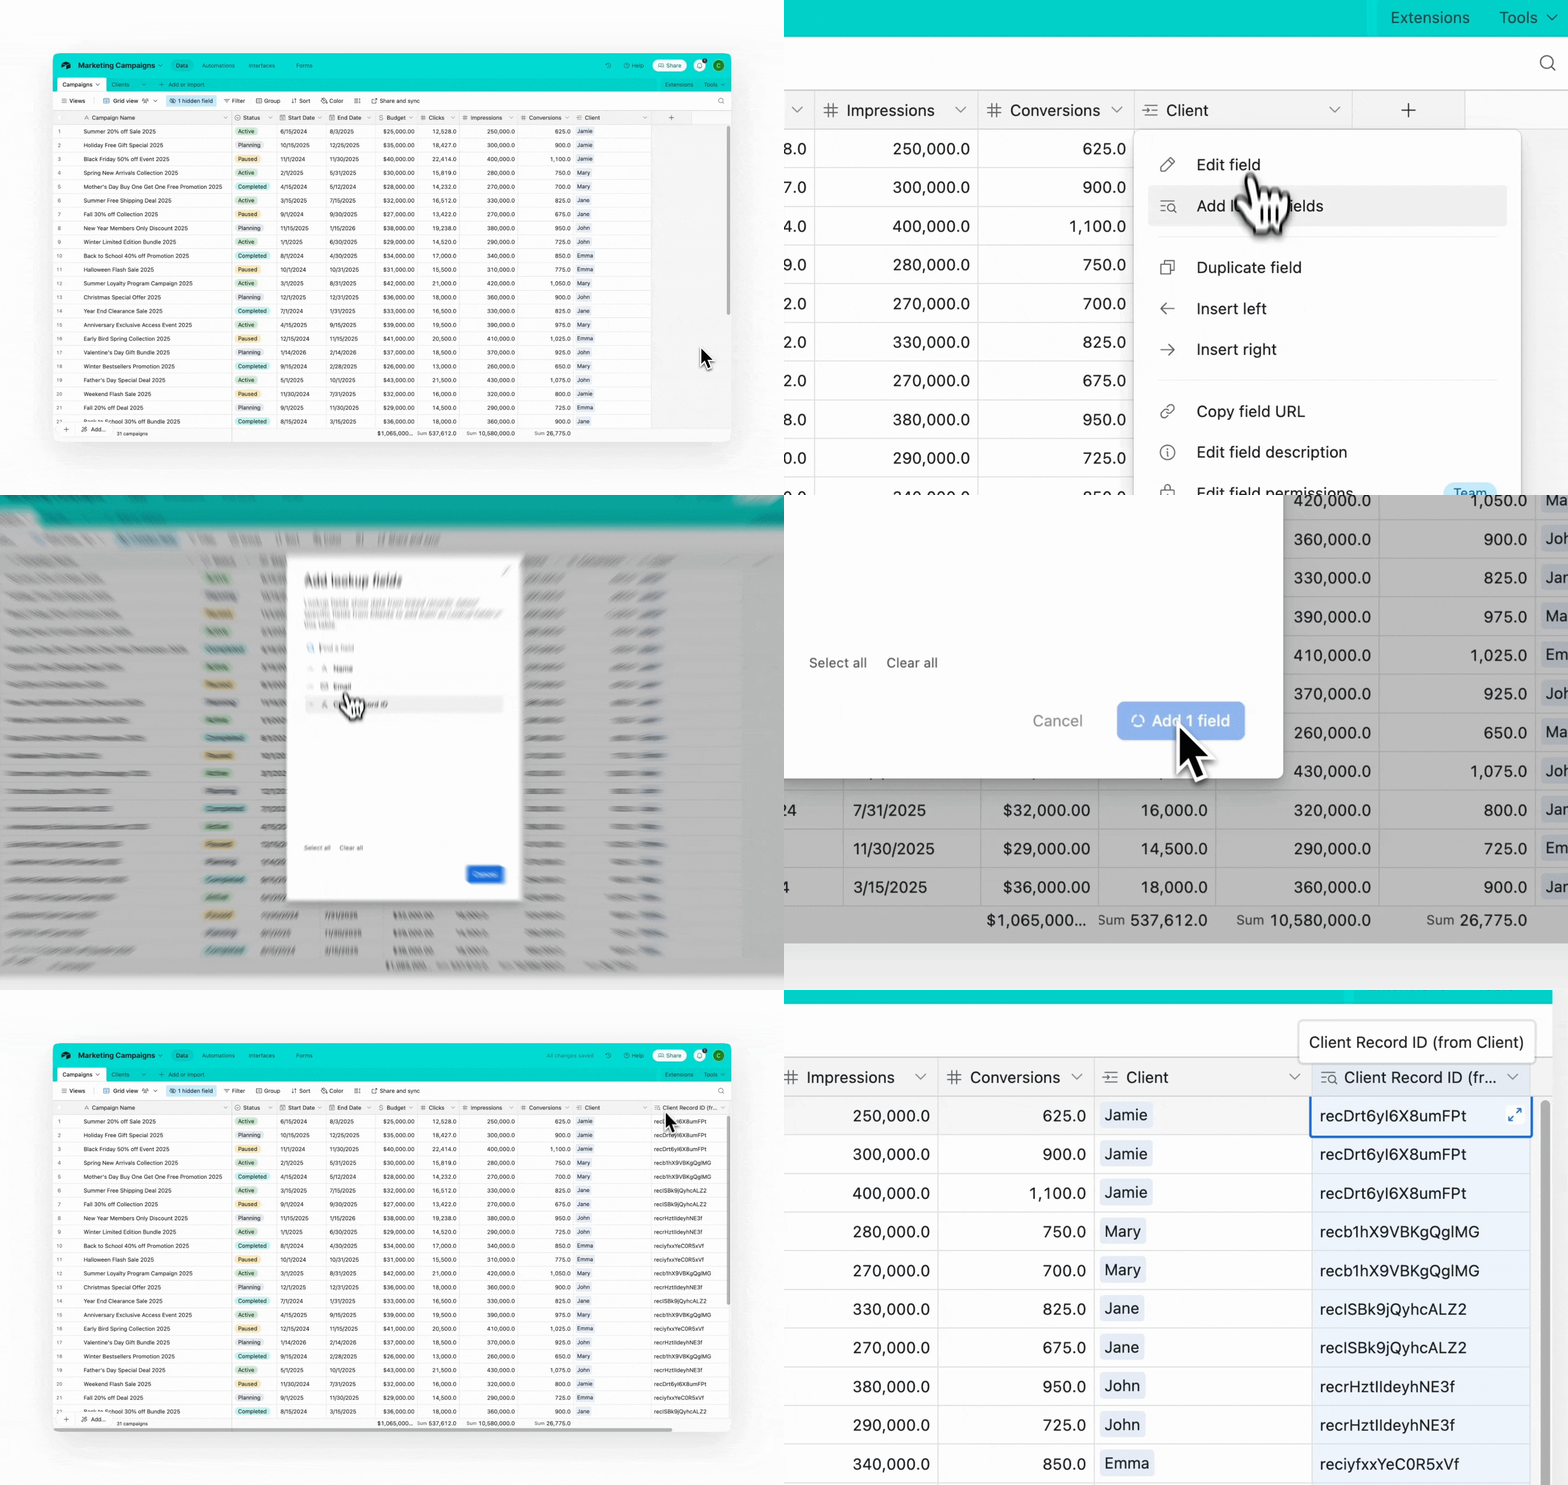
Go to your **Campaigns** table. Add a new **Lookup** field. Configure it:
* Right click on the \*\*Client \*\*field (Linked Record)
* Choose **Add lookup fields**
* Check the **Client Record ID** field
* This creates a field called **Client Record ID (from Client)** that shows the linked client's email on each campaign record.
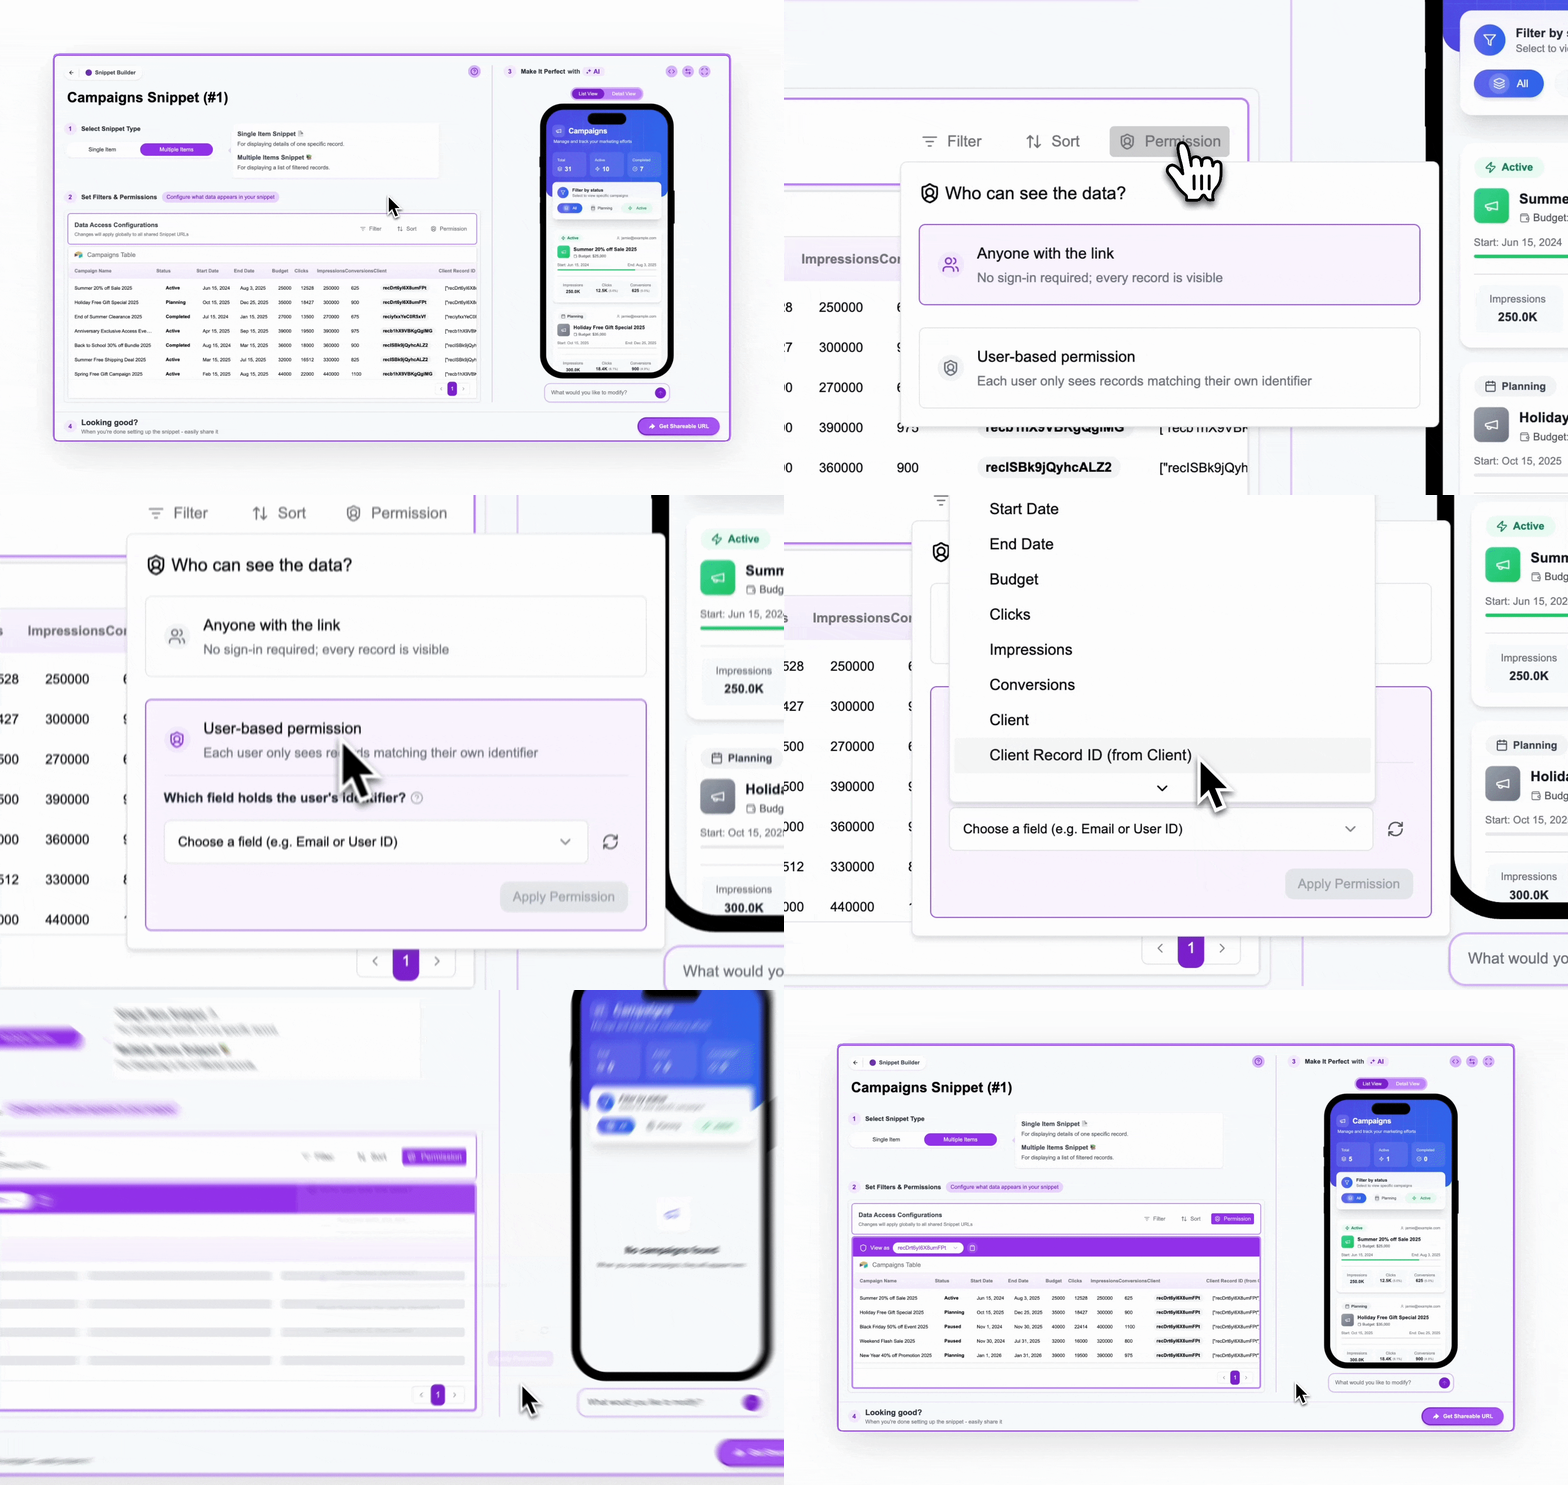
Go back to your Campaigns snippet in the Crust AI Builder (refresh if needed). Navigate to **Step 2 -> Permission**.
* Select **User-based permission**.
* Choose the **"Client Record ID (from Client)"** field as the Permission Field.
* Click **Apply Permission**.
Now, the permission check relies on the much more secure Airtable Record ID. The "Permission Value" needed will be the client's Record ID (e.g., `recABCXYZ`). You would typically *only* share this via Direct URLs generated through automations or buttons, embedding the specific client's Record ID into the `?p=` parameter, making it function like a secure magic link.
***
## Using the "View as" Feature for Testing
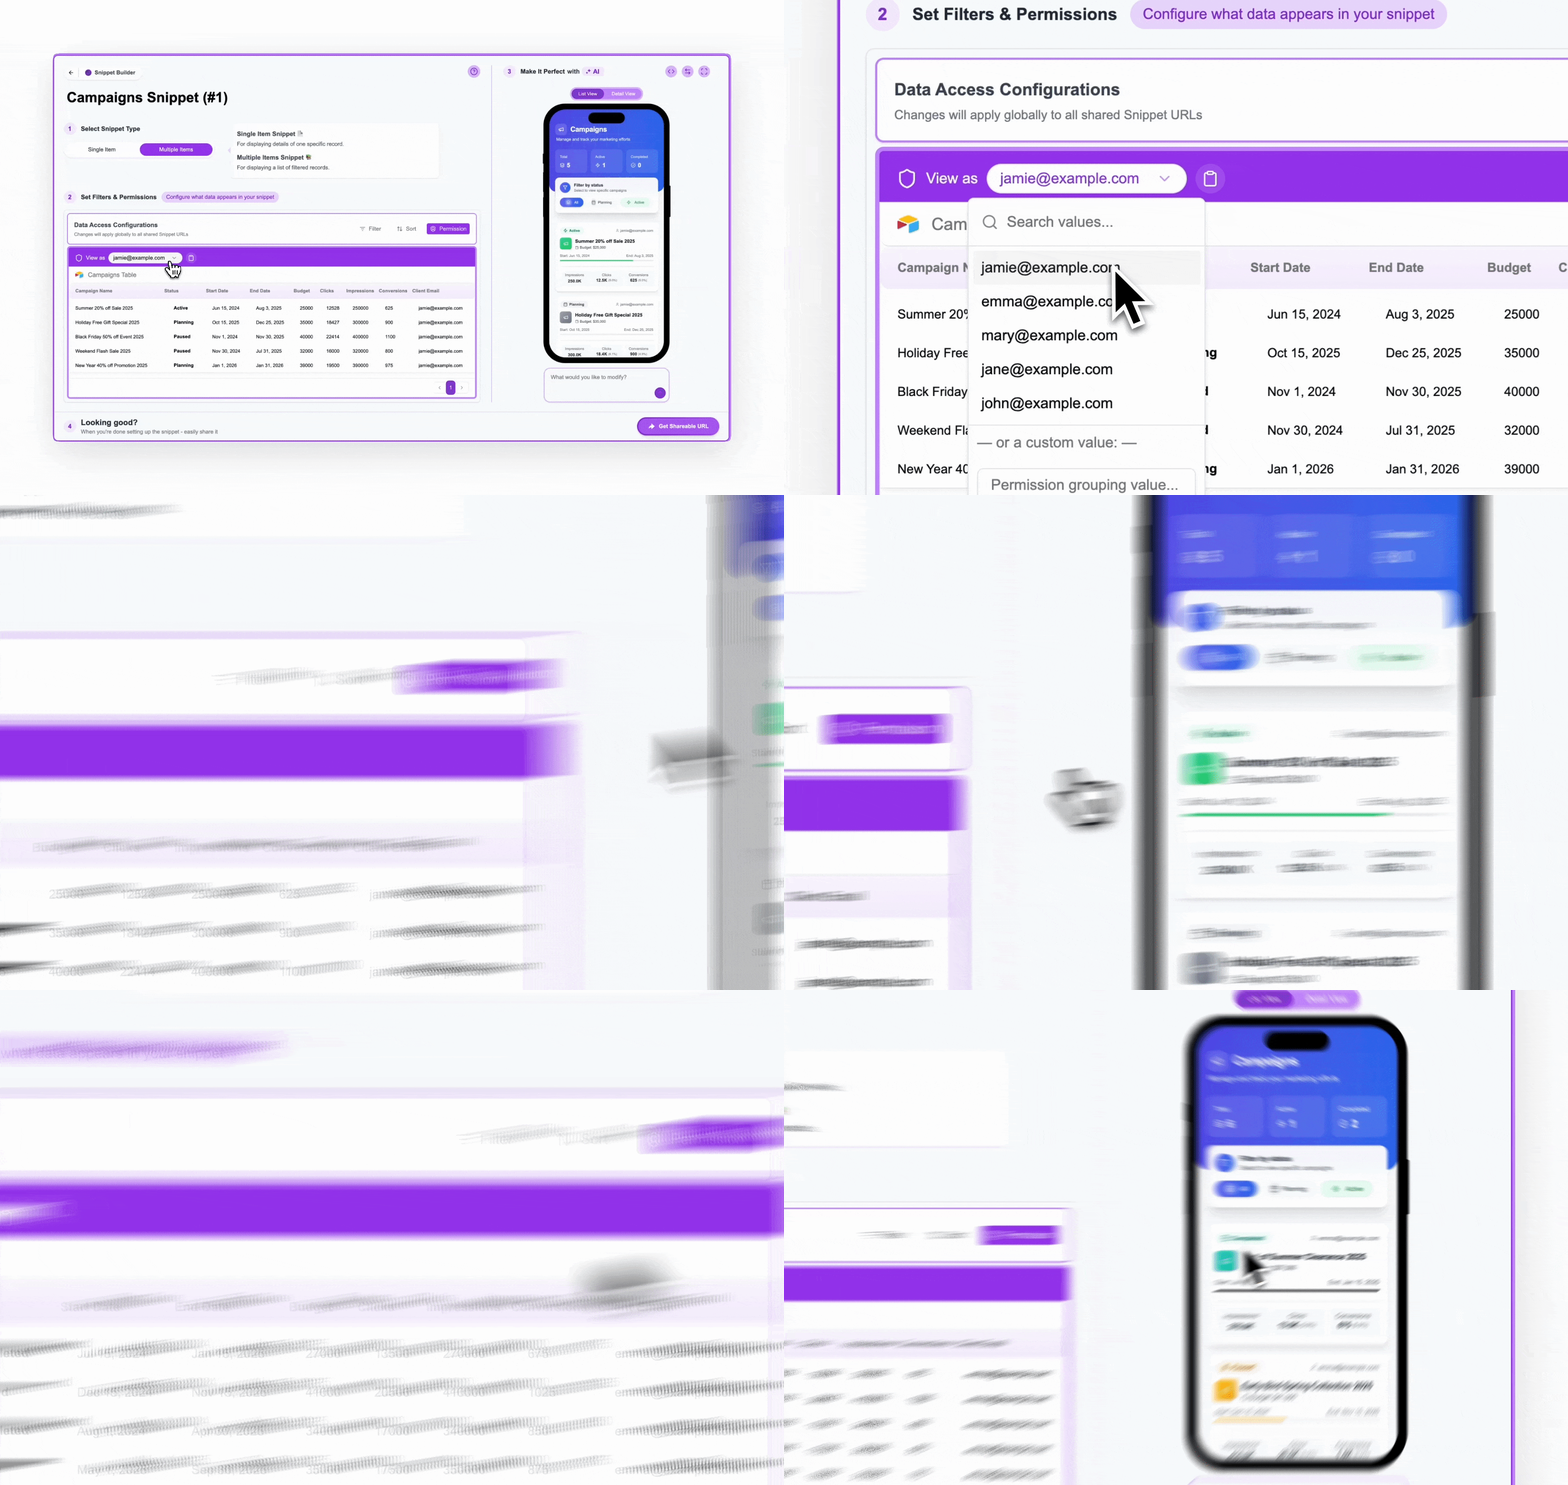
When User-based permission is active, the "View as" input box appears in Step 2. This is invaluable for testing:
* Enter a valid identifier (email, record ID, etc., depending on your chosen permission field) into the "View as" box.
* The table preview below *and* the phone preview on the right will update to show only the records that match that identifier, simulating what that specific user would see.
* The **Copy Direct URL** icon next to the "View as" box becomes active. Clicking this copies the Shareable URL with the `?p=` parameter automatically populated with the identifier you entered in the "View as" box.
This allows you to confidently verify your permission setup and generate specific magic links for different users directly from the builder.
***
**Key Takeaway**\
User-based permission is a cornerstone of creating secure, personalized data applications with Crust AI. By correctly configuring the permission field (often using Lookup fields) and understanding how identifiers are provided, you can share precisely the right data with the right people.